How to Inpaint with Z‑Image Turbo: 3 ComfyUI Methods
Inpainting with Z-Image Turbo
The team behind Z-Image Turbo has promised both an edit variant of the model and an in-painting control net, but you can still get fairly good results in-painting with just the turbo model. This workflow is broken up into three different options.
Inpainting with Z-Image - Option 1: Native Nodes in ComfyUI
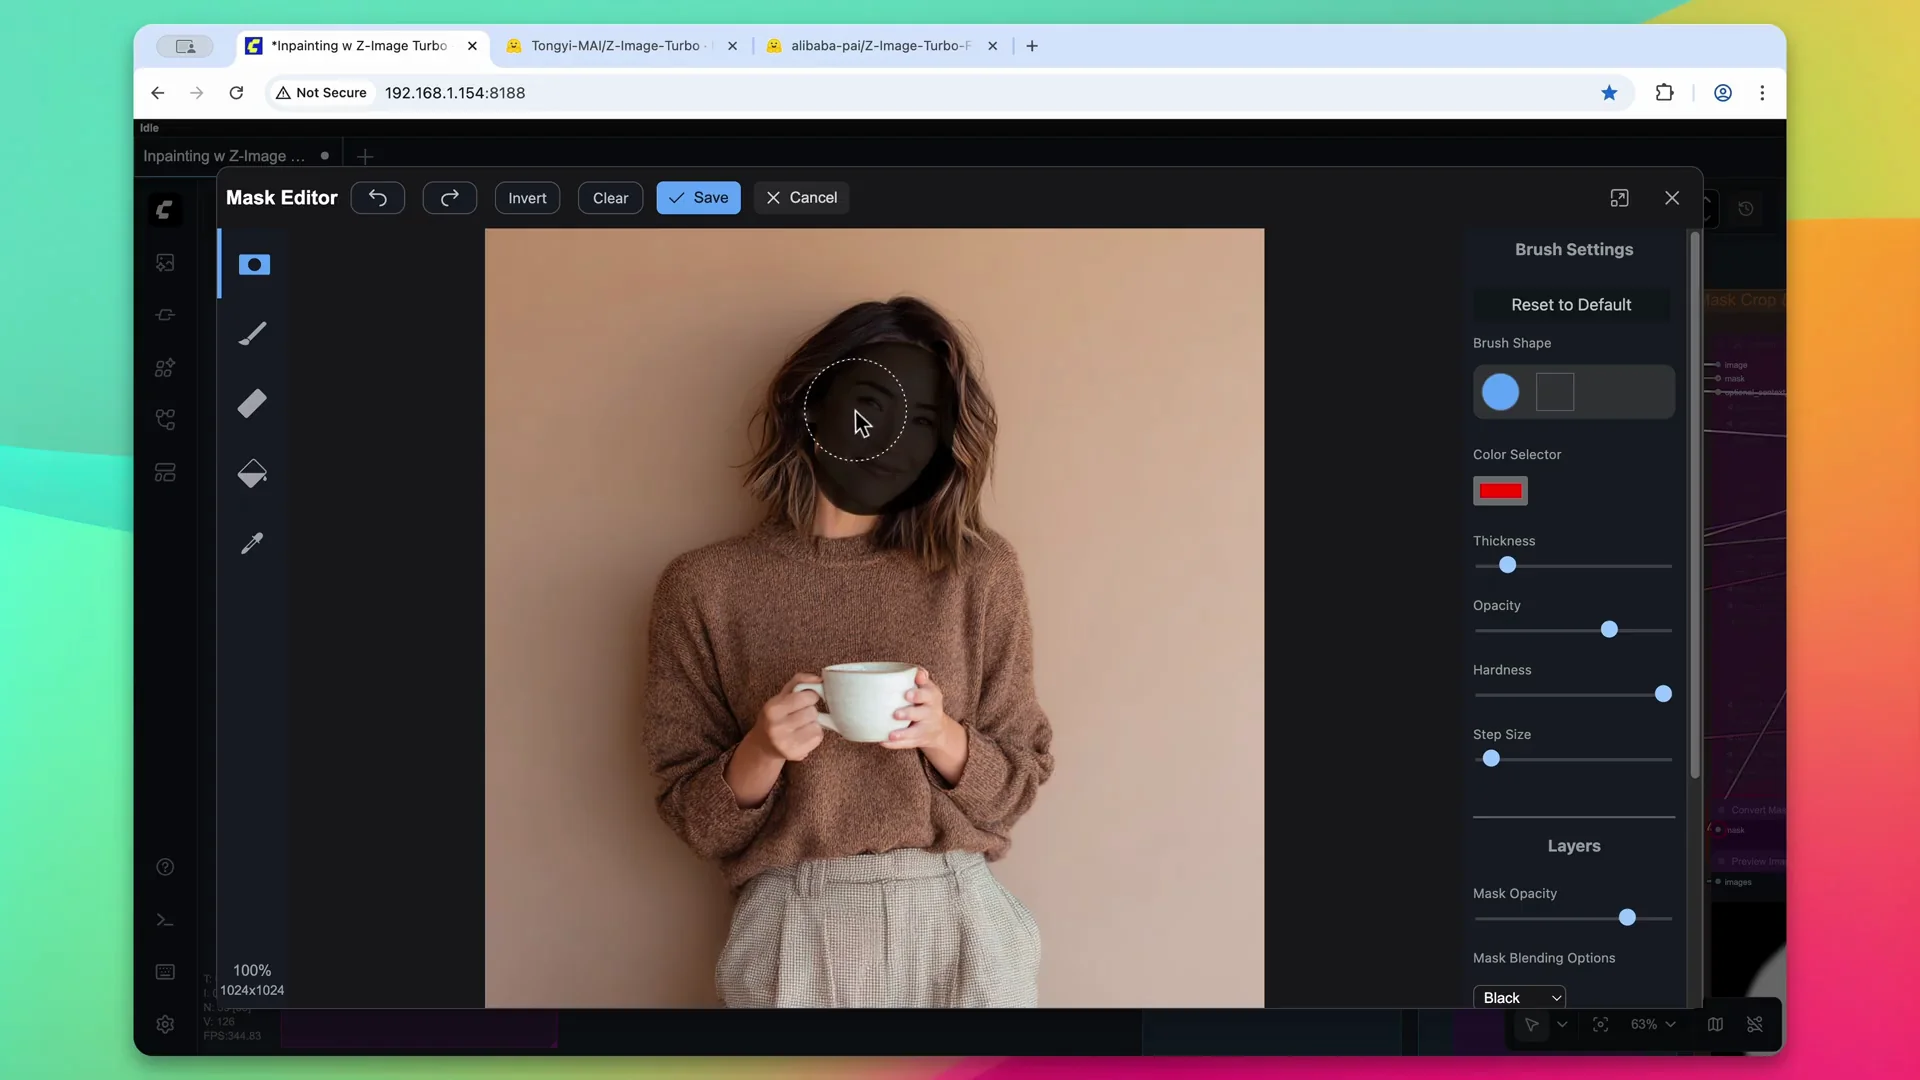
Start by loading the image and opening the mask editor. Change the appearance of the character by clicking and highlighting the area to create the mask. This creates two outputs - the original image and the mask.
Send the mask to the grow mask node to expand it in every direction by 15 pixels. Convert it to an image to blur and soften the edges, then convert it back into a mask.
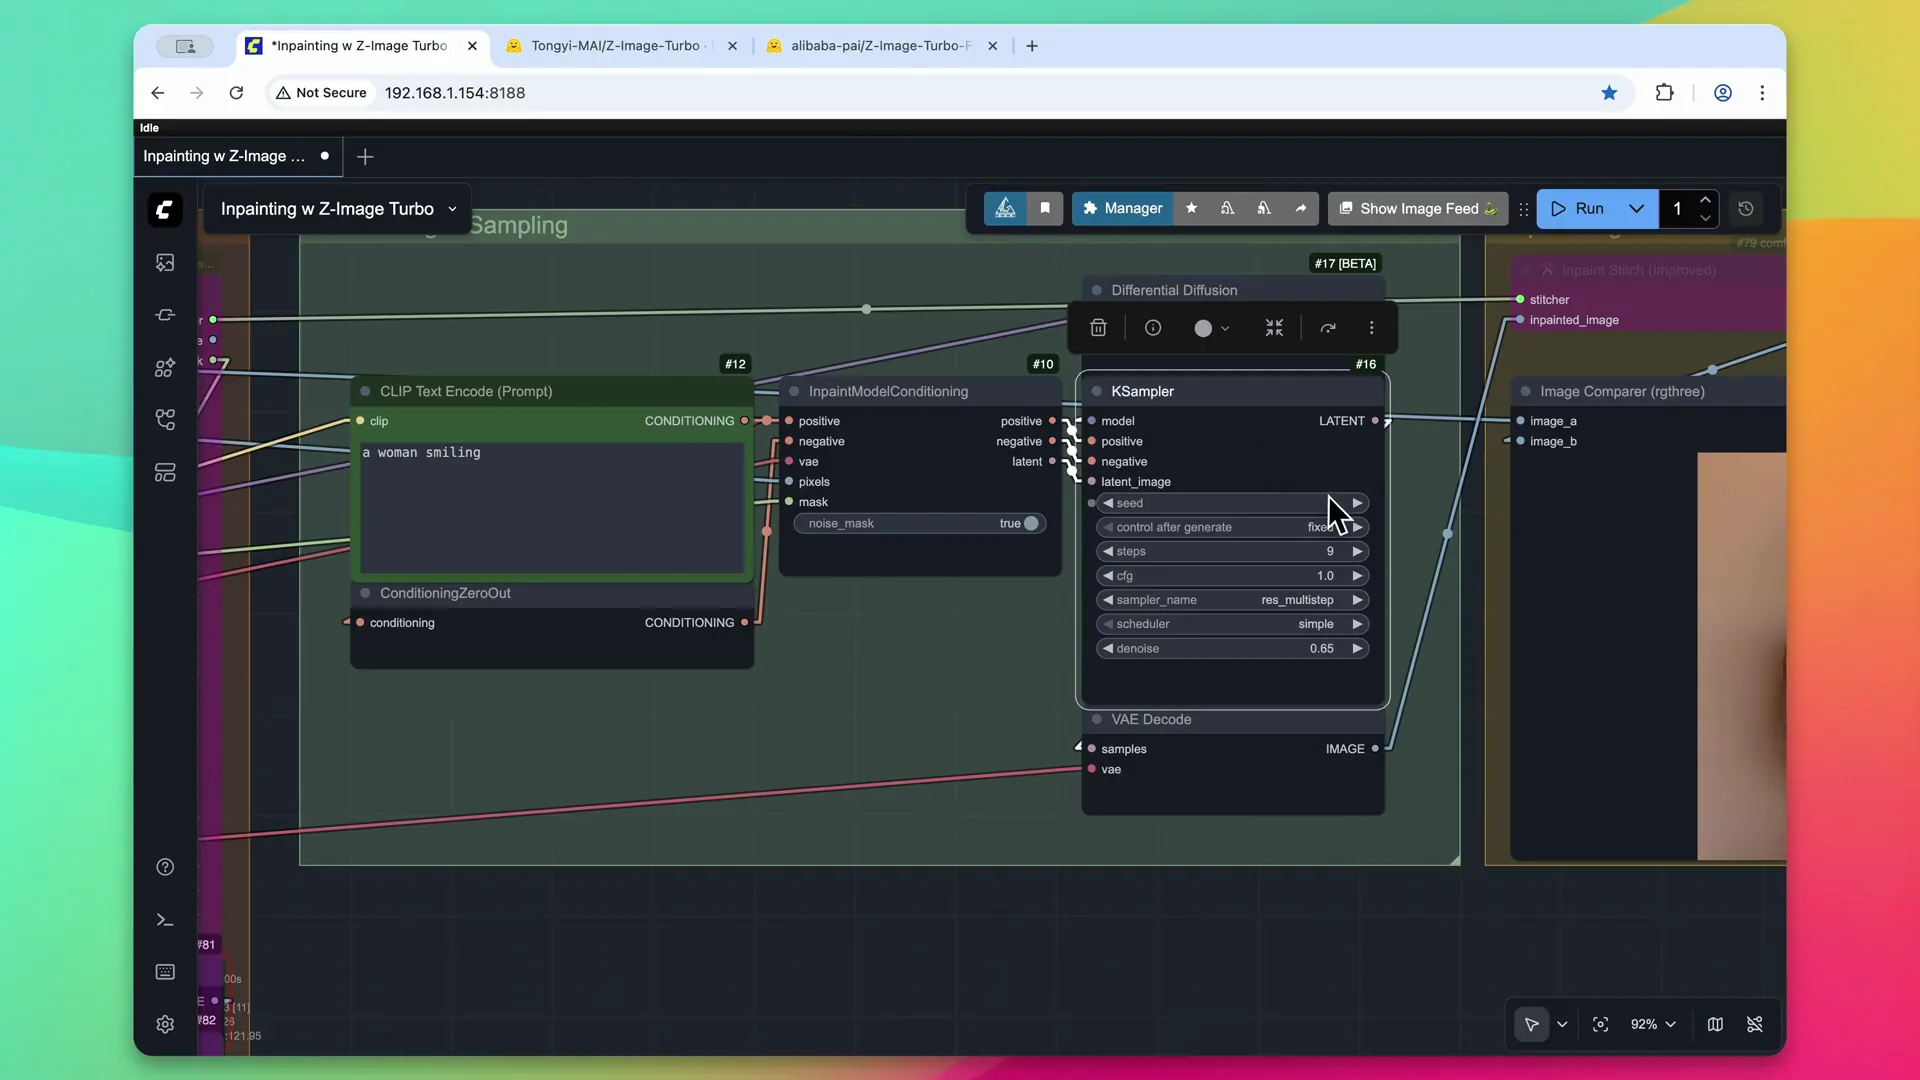
Send both the image and the mask to the in-paint model conditioning node. Give it a prompt - I used a woman smiling. Run differential diffusion for the Z-Image Turbo model to help get softer results. For the KSampler, use the recommended values for Z-Image Turbo. Adjust the denoise value downward slightly so the model will know what is behind the mask and preserve some of the original character's appearance.
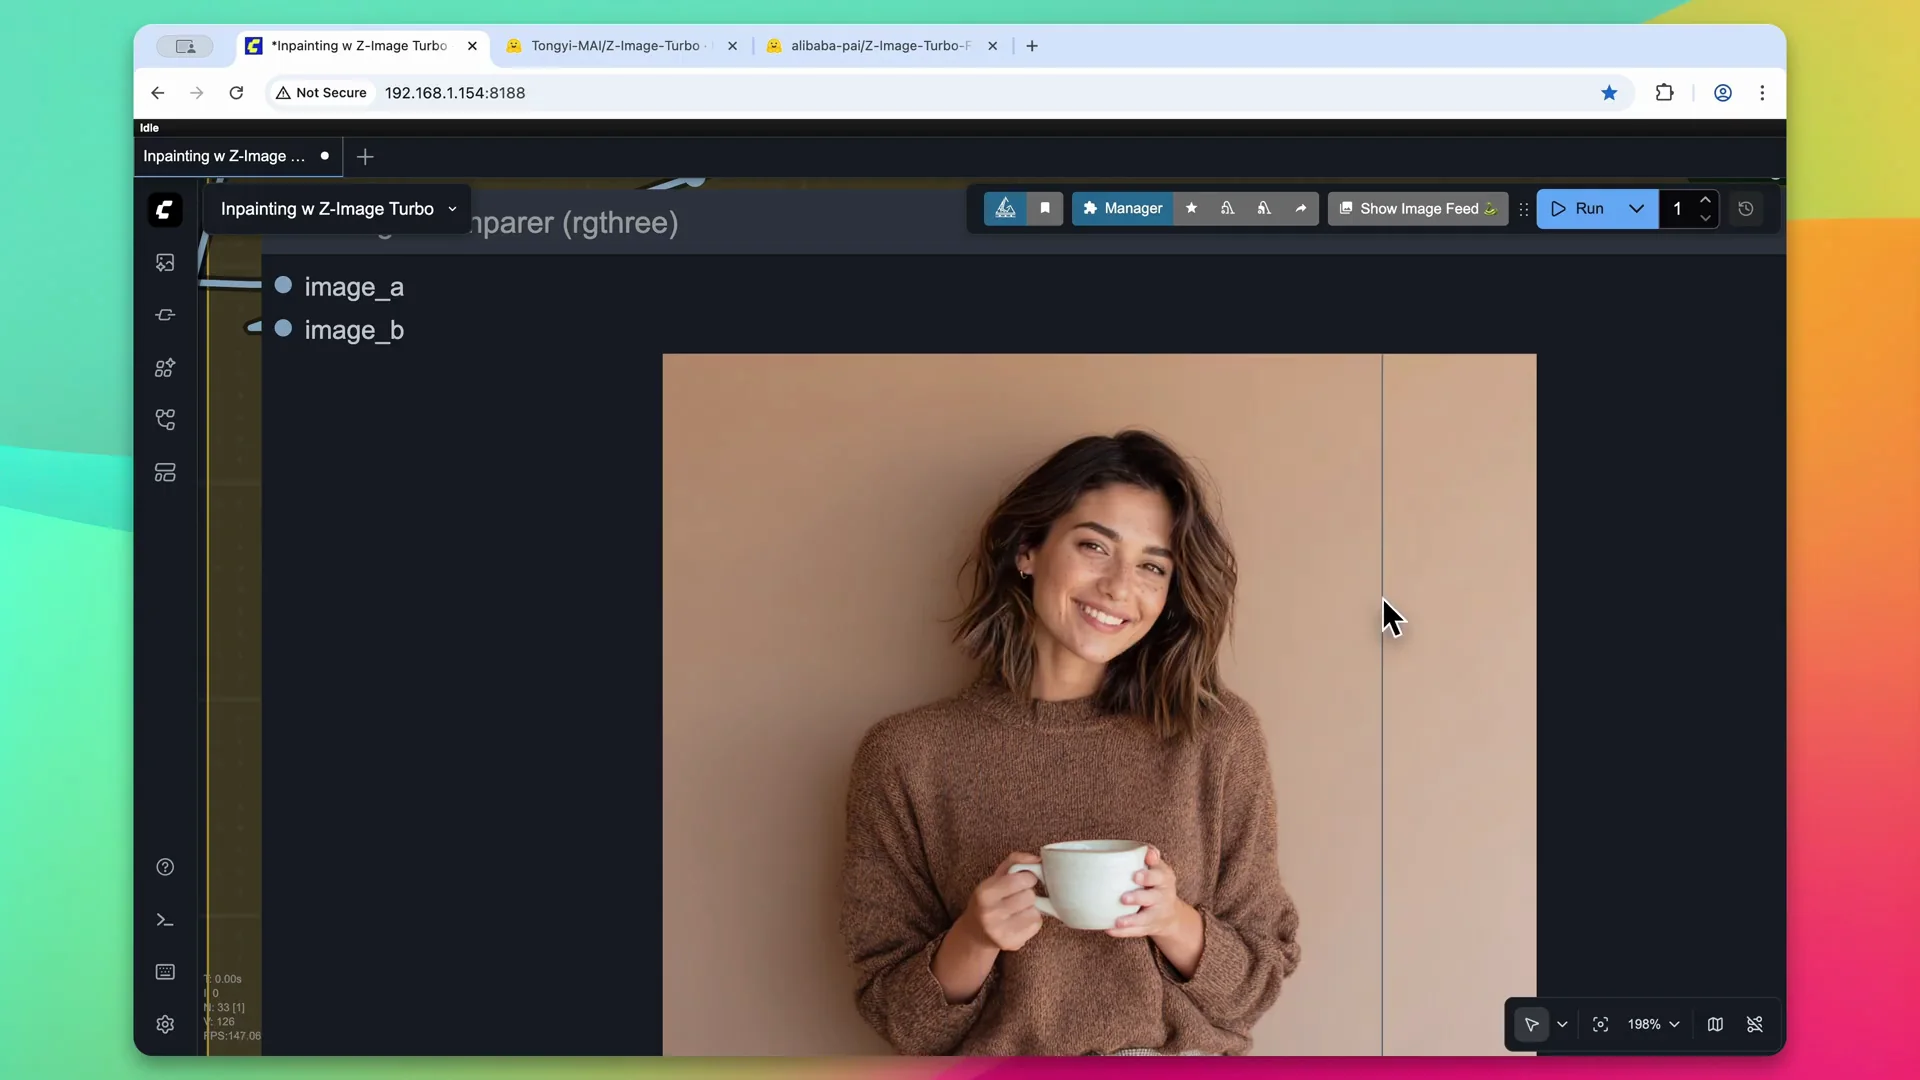
Process the workflow. The character takes on a much more realistic appearance without the shiny skin that is normally associated with AI images, thanks to Z-Image Turbo.
Inpainting with Z-Image - Option 2: GrowMaskWithBlur via KJ Nodes
This is similar to option 1 but a little more compact. Keep the masked image within the loadImage node and pass the mask to the growMaskWithBlur custom node, courtesy of ComfyUI KJ Nodes. It expands the mask slightly and applies a slight blur. Use the previewImage node to see the resulting mask.
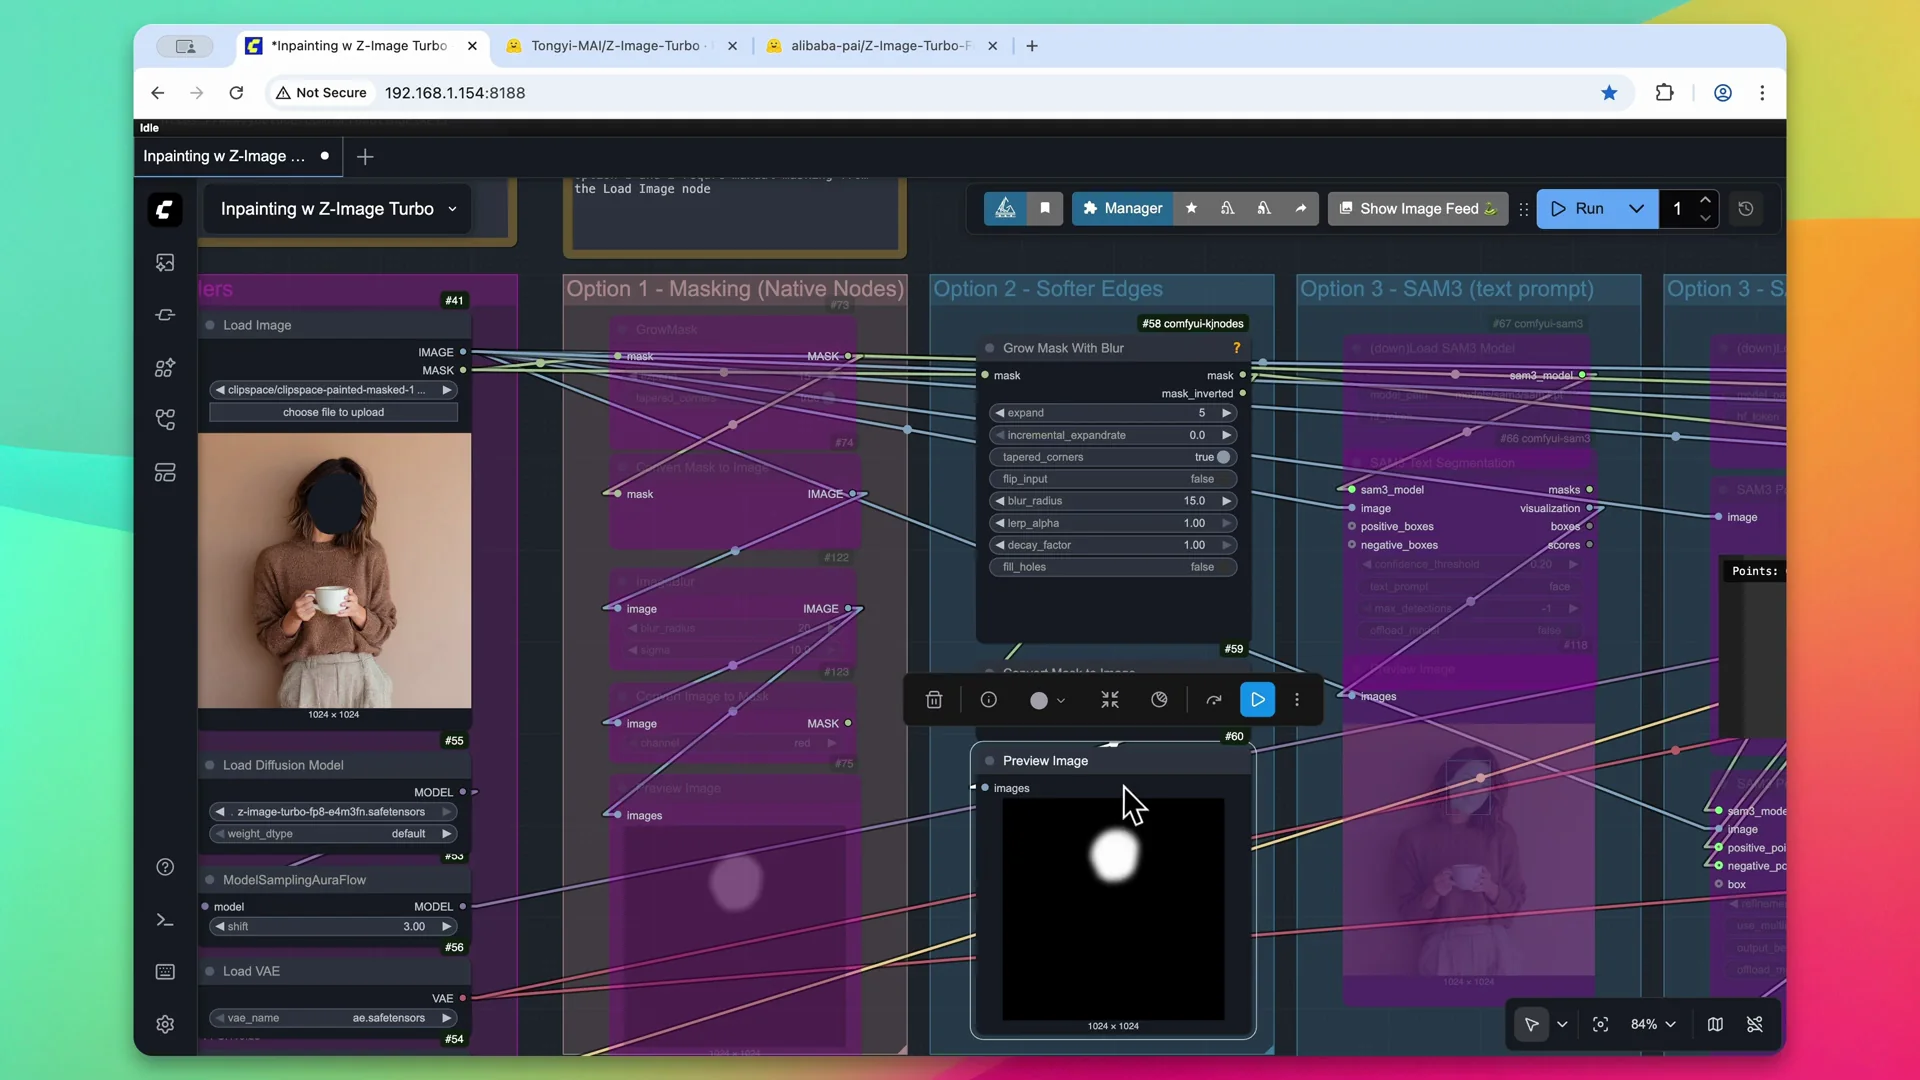
Pass the mask and the image back to the in-paint model conditioning and run. Keep the same text prompt and the same denoise value for this image to get similar results. The output again removes the AI sheen from the skin and looks more realistic, thanks to in-painting.
Inpainting with Z-Image - Option 3: Segment Anything plus In-Paint Crop and Stitch
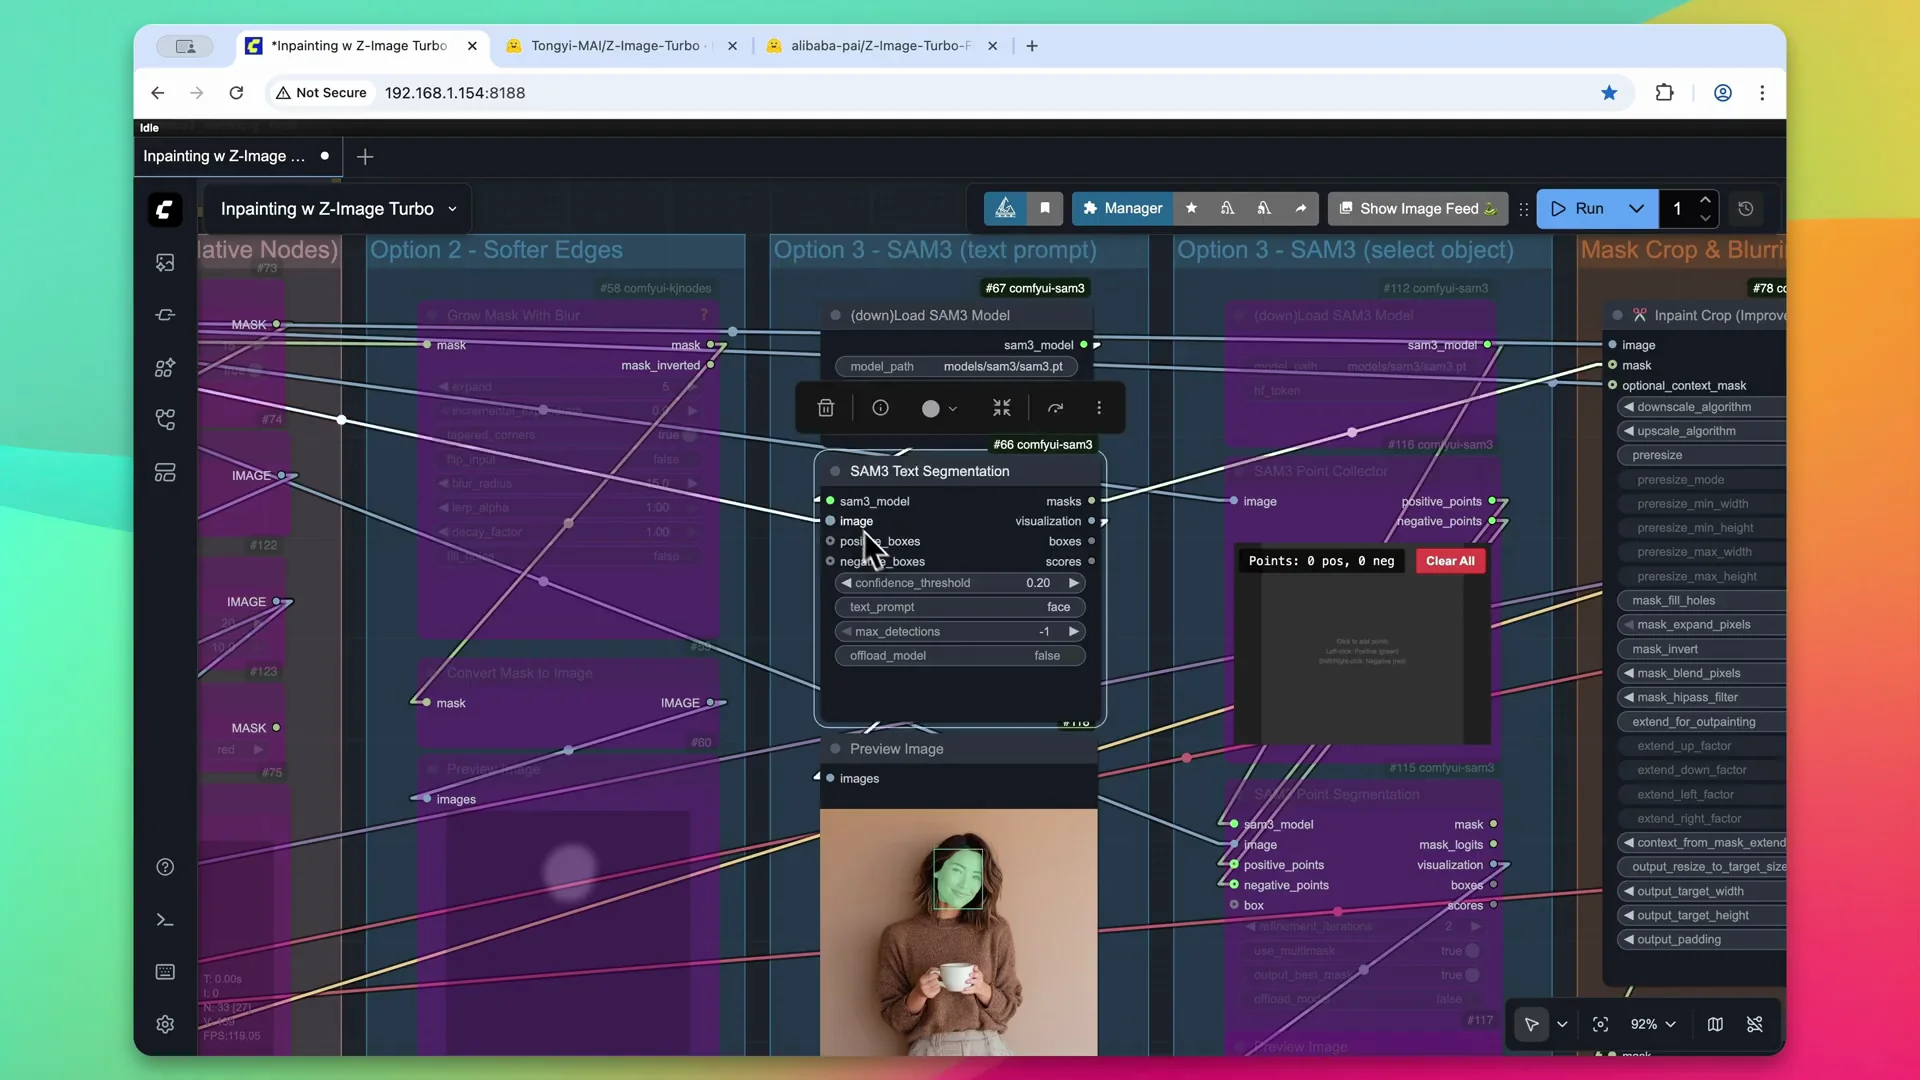
Set up SAM3 and segment by prompt
Reset the loadImage node to the original source image and pass the image into the segmentAnything3 custom nodes. You can find this on the ComfyUI manager - it is called ComfyUI-SAM3. Load the model and segment by a simple text prompt. Using face creates a perfect bounding box of the subject's face, which avoids manual masking.
In-Paint Crop settings
Once masked and segmented, send the output into the in-paintCrop node. This custom node is called ComfyUIInPaintCropAndStitch. Pass the image, original image, and mask to this node. I disabled maskFillHoles because segmentAnything3 can collect more information and be more precise, which may create holes in the mask that you do not want to in-paint over. You can toggle that on and off. I also changed the default width and height from 512 by 512 to 1024 by 1024. The resulting mask is very precise and also blurred, thanks to the node options.
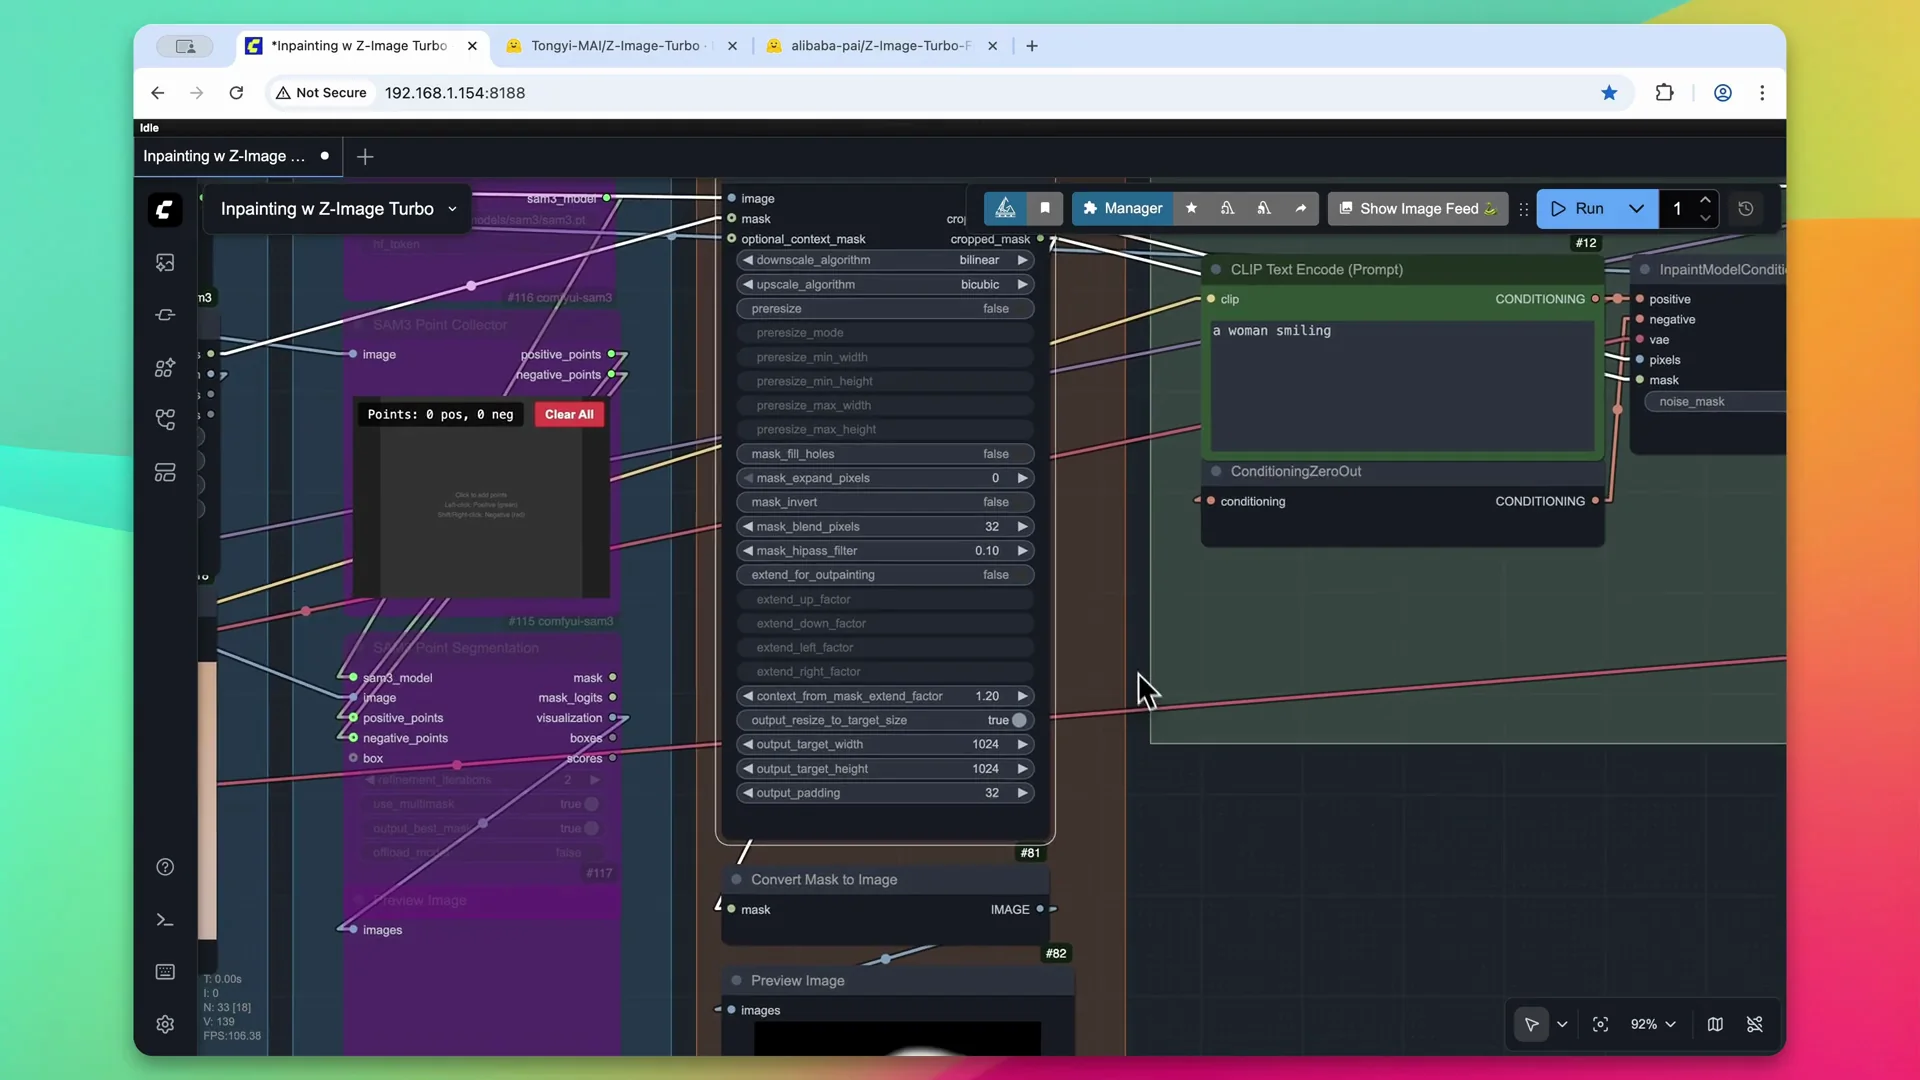
Conditioning, sampling, and stitching
Keep the same text prompt, but send the cropped image and cropped mask to the in-paintModelConditioning node instead of the raw mask or raw image. Leave the KSampler settings as they were and pass the final image to the in-paintStitch node. This ensures the image looks correct and is pasted together, then provides an output.
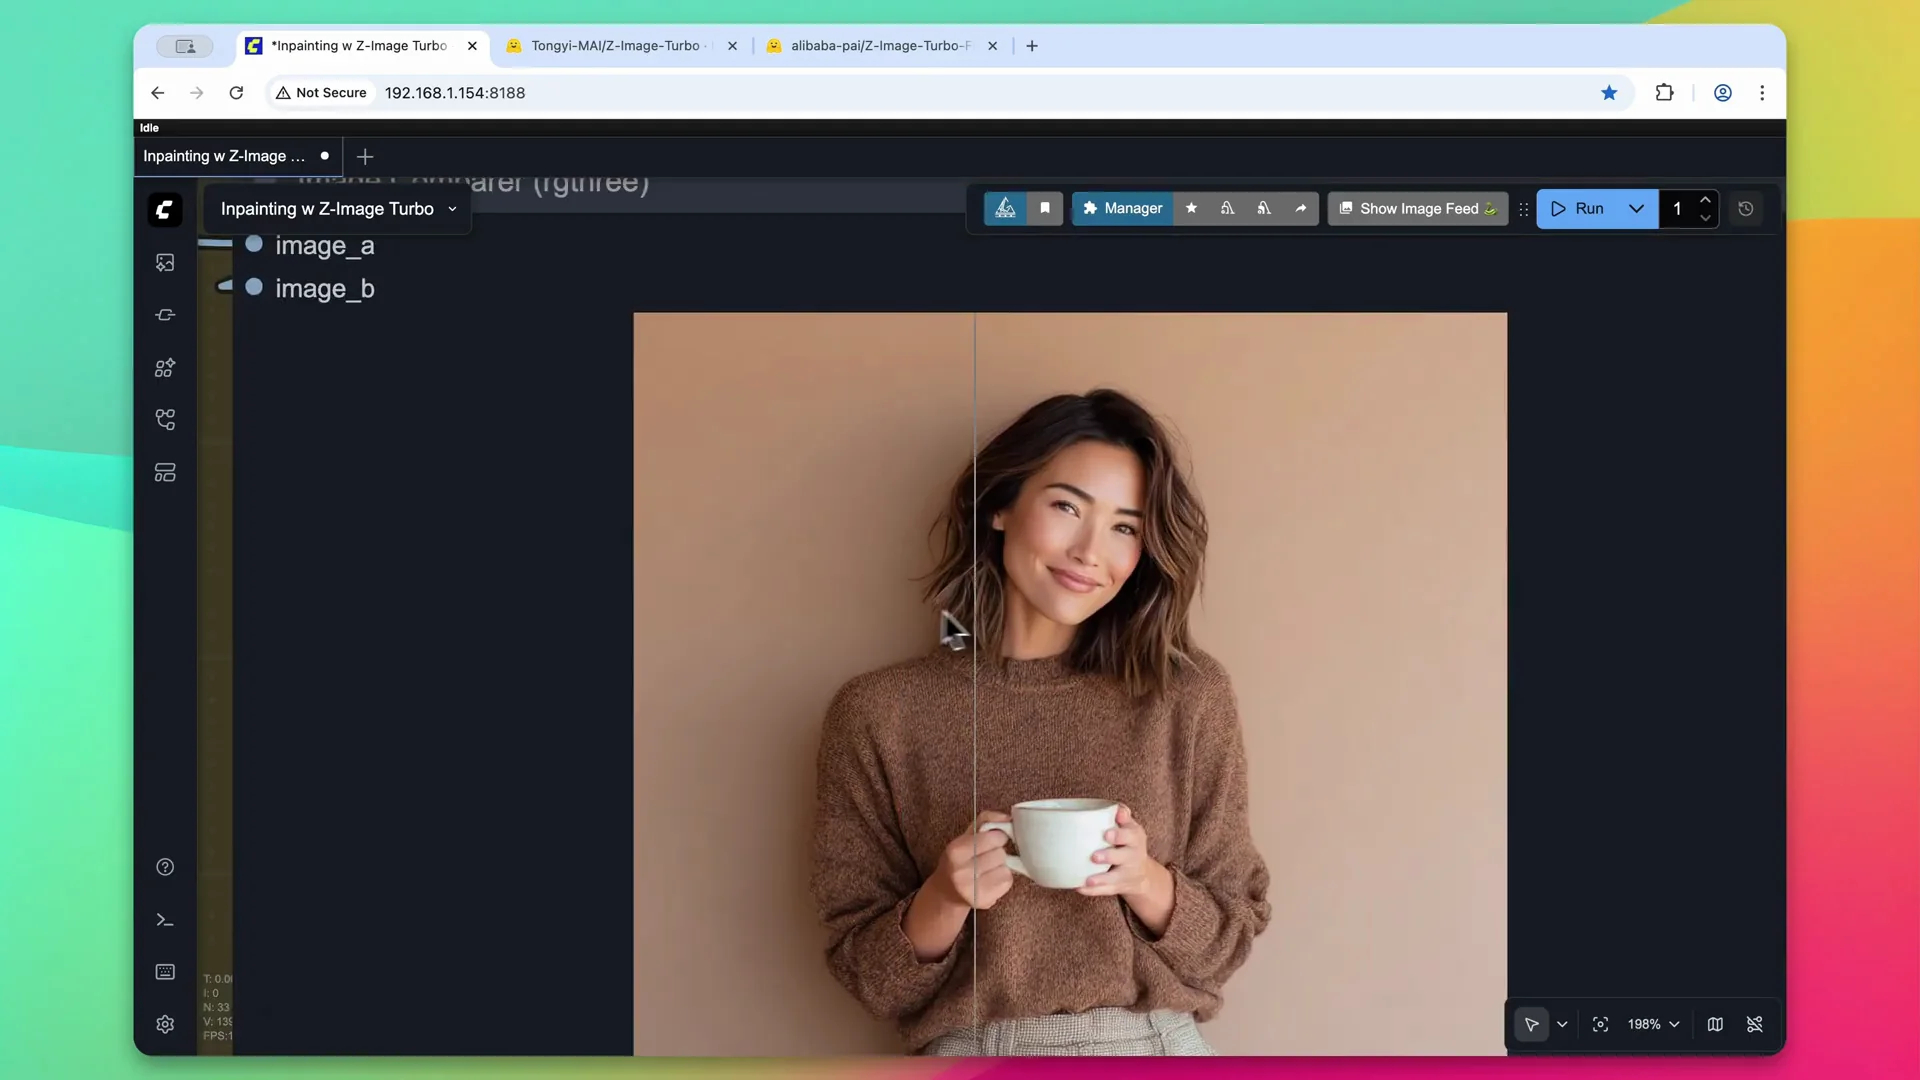
Results and tweaks
The output is much more precise. Even around her ear it has been in-painted, and the entire contours of the face are exactly the same. You can increase the blur if you want to change any of those in the final output.
Inpainting with Z-Image - Selecting Objects with Segment Anything
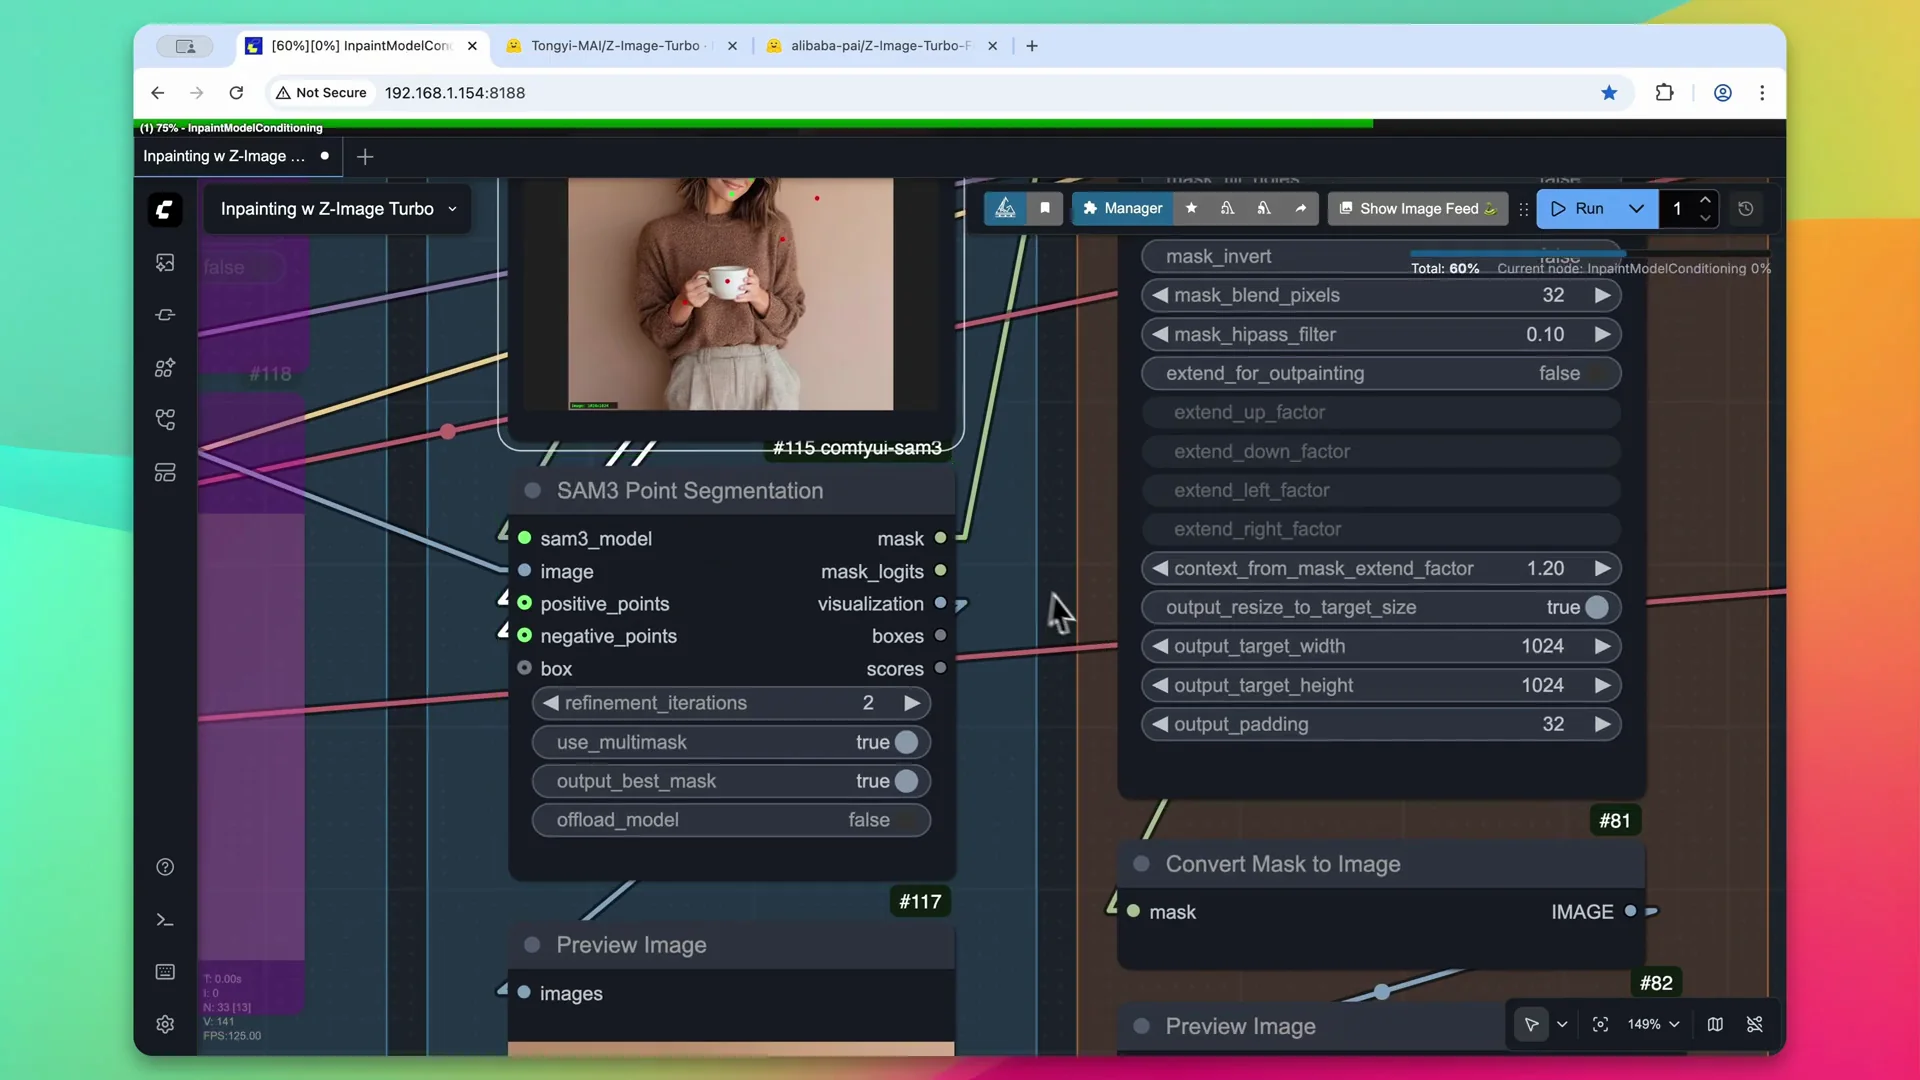
There is a Select Object option within the Segment Anything nodes. With the same SAM3 model loaded, instead of defining what to in-paint with a prompt, select it on the image. This can be useful if you have a general area that you want to in-paint. To mask her face, make a few selections on the image. You can also give negative selections by holding down the Shift key and selecting other areas. I recommend only doing this if the mask is not working correctly.
Process the mask and it will go through point segmentation and provide a mask. In this example it selected her face and neck area, and it looks like a point on her fingertip was also selected within the mask. Send it to the In-Paint Crop node to crop it and blur the mask for slightly better results, pass it through the Clip Text Encoder along with In-Paint Model Conditioning, and sample the image. The final output shows some quality issues with this particular selection, so you might need to play with it more. Regarding the finger selection, I am not noticing too much change in the pixels, although I would have to look at it closer at full resolution.
Final Thoughts
In-painting with Z-Image Turbo works well with native nodes, a compact KJ Nodes setup, or a more precise SAM3 plus Crop and Stitch approach. Keep the denoise slightly low to preserve context behind the mask, grow and blur masks for clean edges, and consider cropping and stitching for higher precision. The Select Object method can help in tricky cases but may require refinement.
Recent Posts

How to use Grok 2.0 Image Generator?
Learn how to access Grok 2.0’s AI image generator (Premium required), write better prompts, and avoid pitfalls like real people and brands. Step-by-step tips.
How to use Instagram AI Image Generator?
Use Meta AI in Instagram DMs to turn text into images—and even animate them. It’s free, fast, and built in. No external apps needed; create art right in chat.
Leonardo AI 2026 Beginner’s Guide: Create Stunning Images Fast
Learn Leonardo AI step by step—sign up, explore Home, and generate or enhance photos with free, powerful tools. A quick, clear starter for beginners.