ComfyUI ControlNet Union with Zimage Turbo: Step-by-Step Guide
Introduction to Zimage Turbo ControlNet Union
I’m covering the new Zimage Turbo on ControlNet Union. This is about using the power of Zimage Turbo with the flexibility of control nets, specifically the new ControlNet Union. It opens up some incredible possibilities for image generation and manipulation.
Head over to the HuggingFace website. Alibaba has recently released the Fun ControlNet Union and it’s definitely something worth exploring. You’ll find a ton of resources there. In their documentation, they’ve provided pose, depth, and canny examples to showcase the functionalities.

I’m going to demonstrate how to use canny, depth, and pose control nets within this framework. I’ll walk you through the setup, the workflow, and some tips and tricks to get the best results.
Setup and Model Placement for Zimage Turbo ControlNet Union
The first thing you’ll need to do is find the model. On the HuggingFace page, it’s the Zurbo Fun Control Union model. Copy the model name or the download link and then download the necessary files.

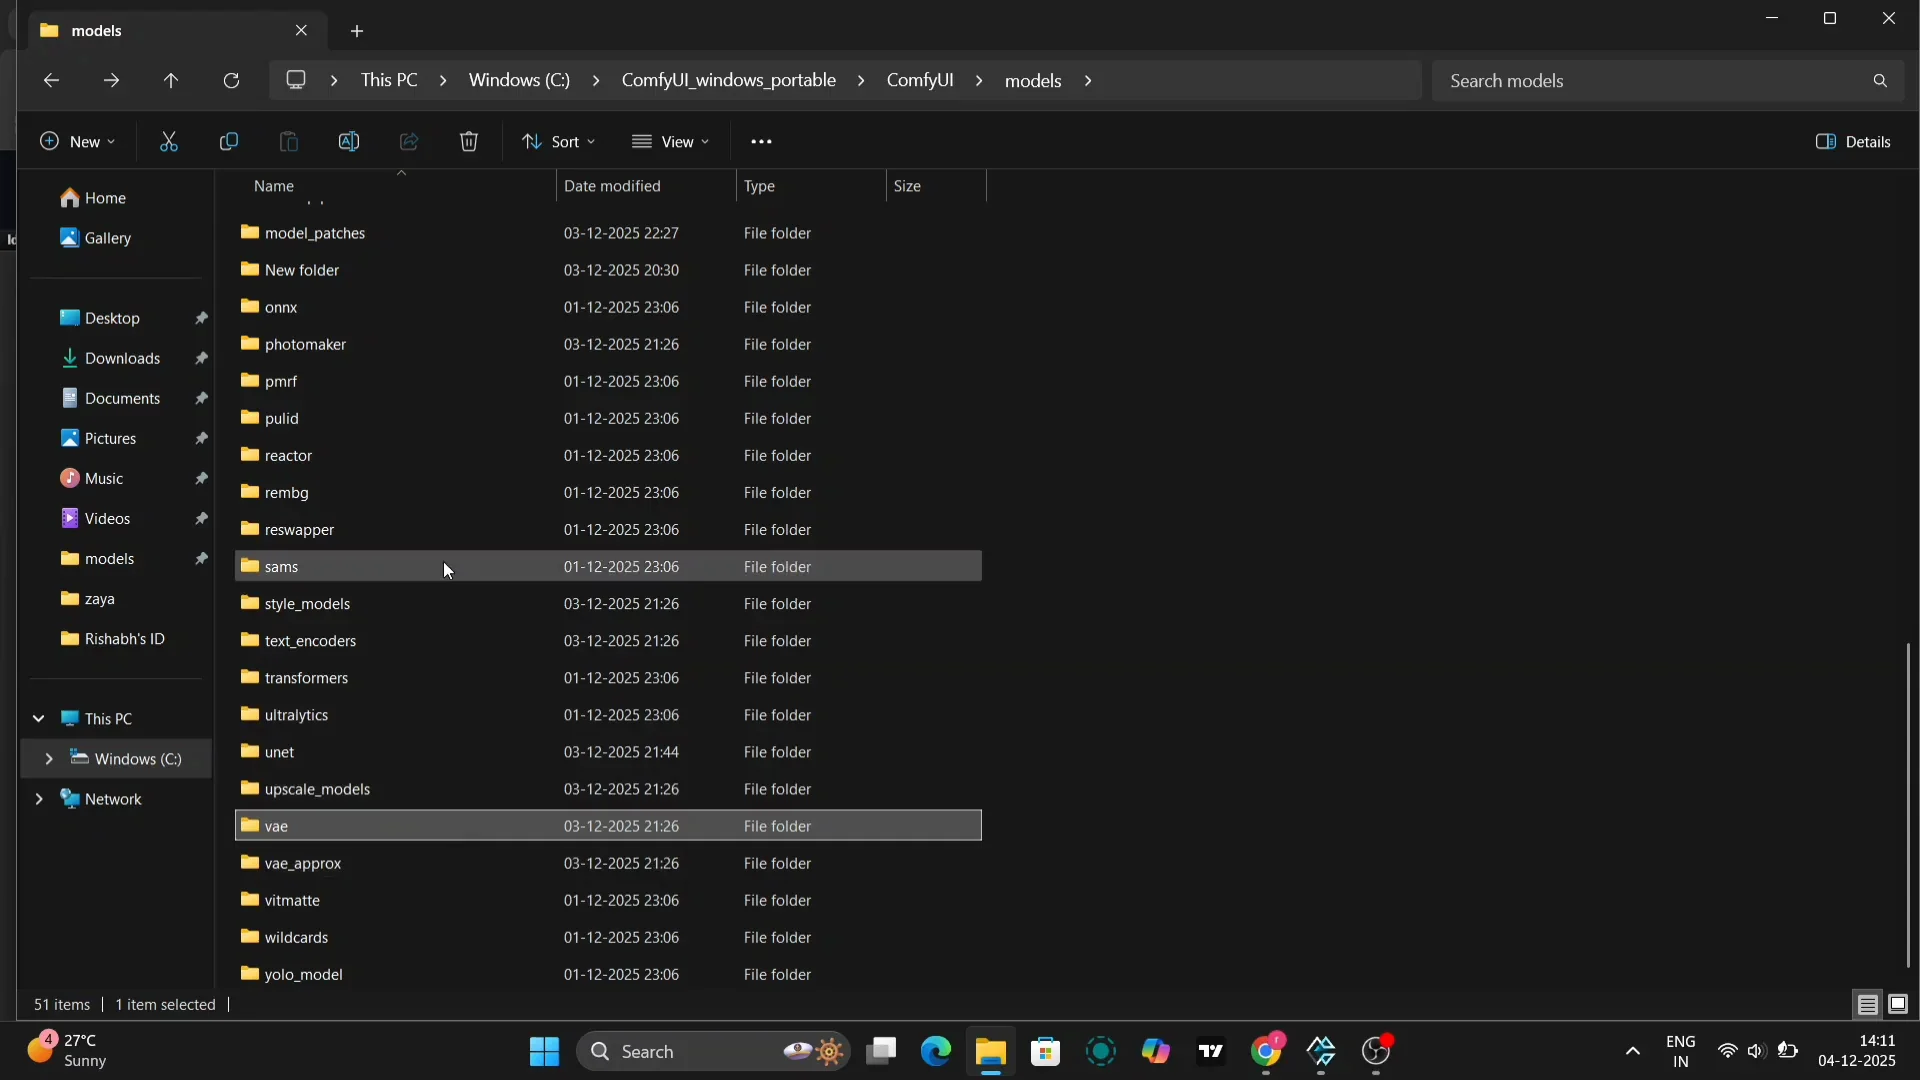
You don’t put the control net model in the standard control net folder. Open your computer’s file explorer and navigate to your models folder. Within the models folder, you’ll find a folder called diffusion models. This is where you need to place the Zimage Turbo model. Make sure you have all the necessary VAE files in the correct location.
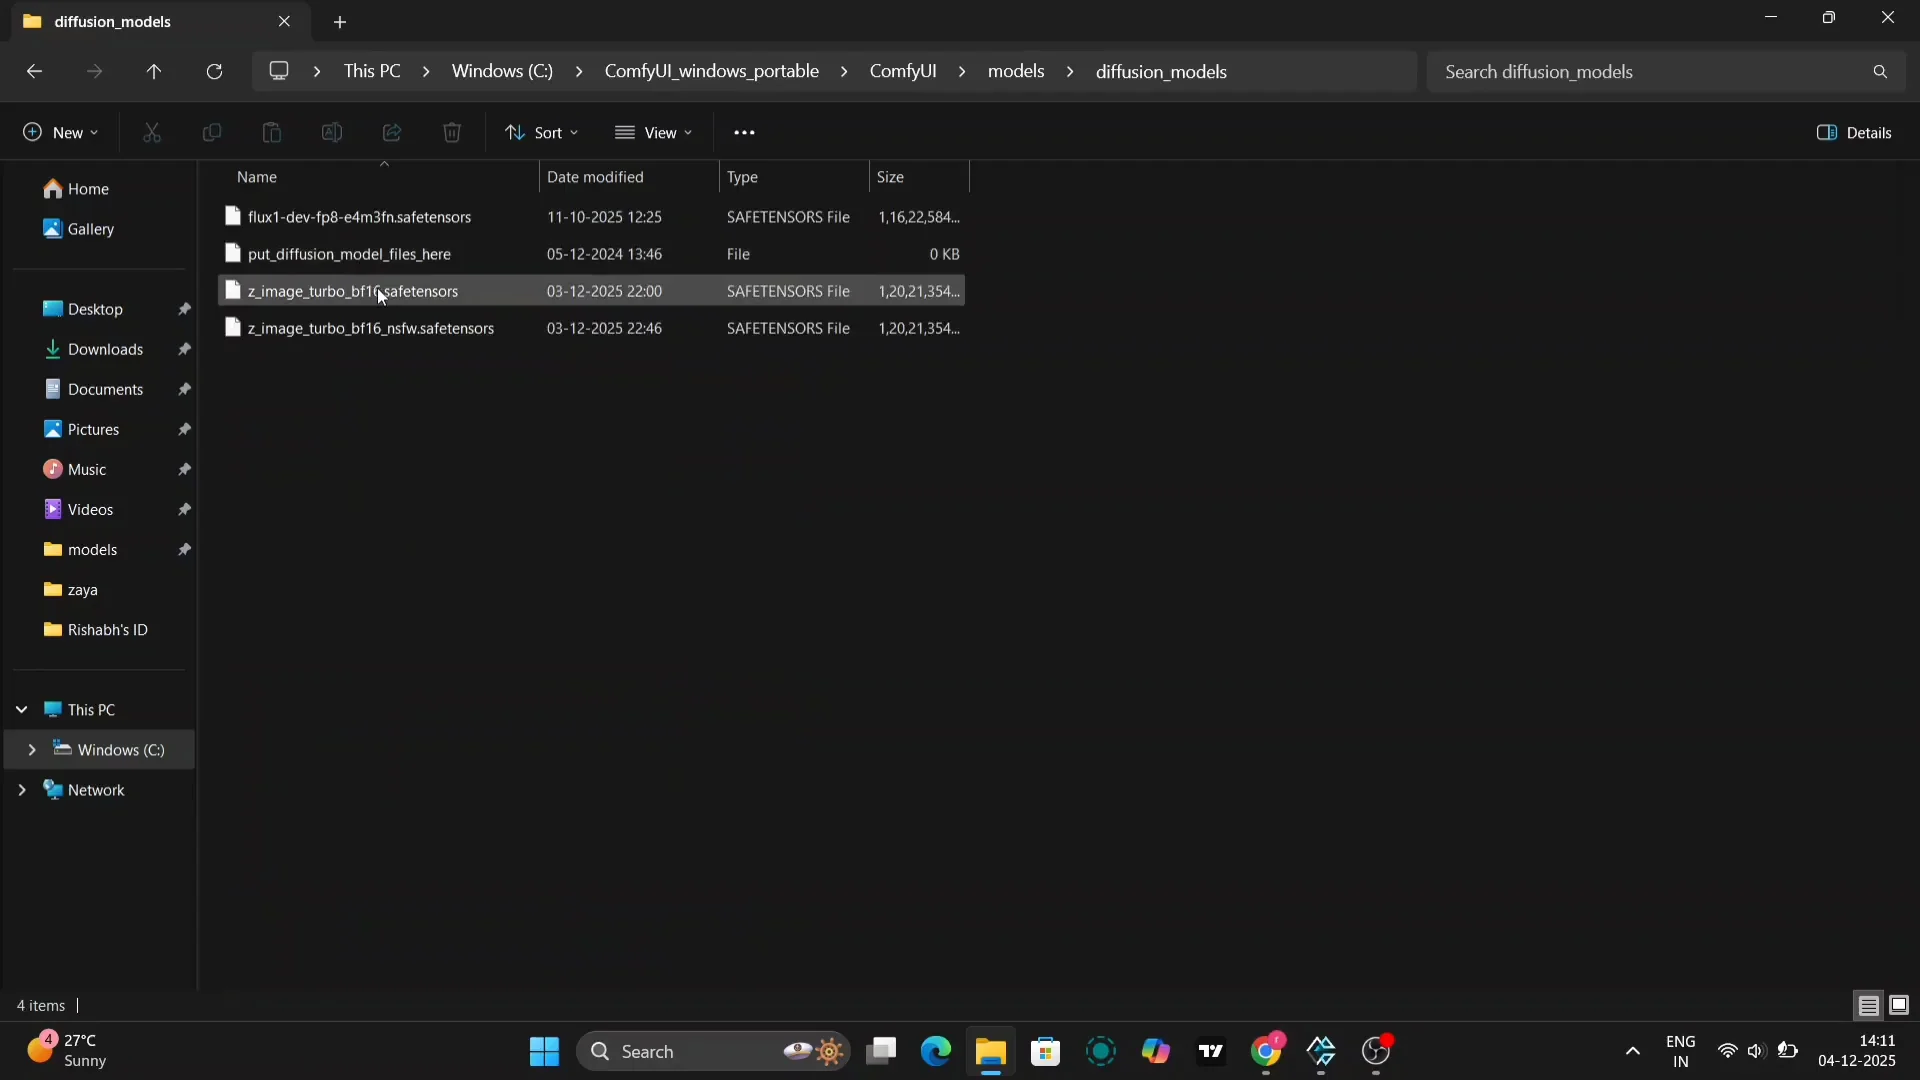
Next, deal with the text encoder. The text encoder needs to go into the text encoder folder. If there isn’t a model patch folder, create one and name it model patch. Paste the control net model files into that folder. It sounds a little complicated, but once you’ve done it a couple of times, it becomes second nature.
Workflow and Settings with Zimage Turbo ControlNet Union
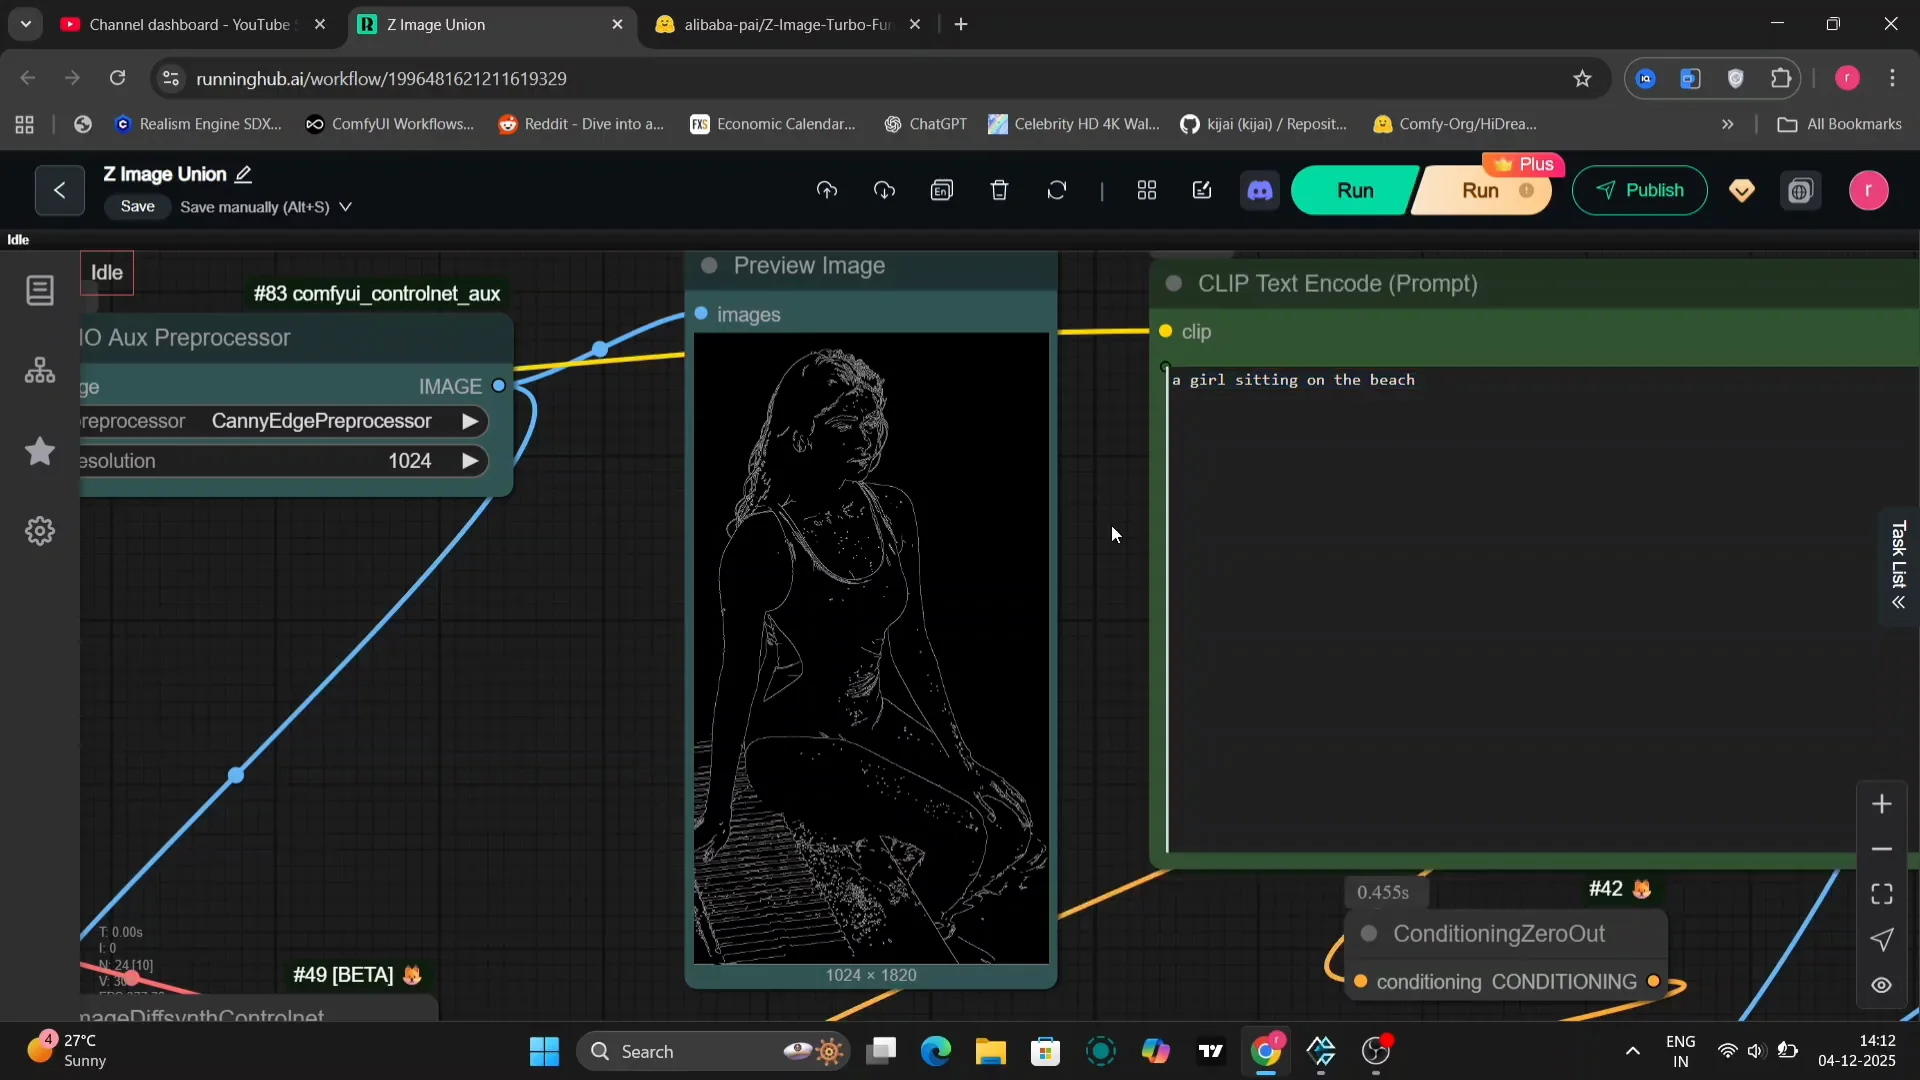
In this example, we’re starting with an image of a girl. This will be the base for our image generation. Here’s the turbo model that we are using. If you want to use GGUF, you can use the GGUF as well.
We’re using the Quen control net. One important thing to note is that the strength setting can significantly impact the final image. I found that a strength of around 0.95 to 0.9 often works well, but feel free to experiment to find what works best for you. I’m going to show examples using canny, depth, and other control nets so you can see the differences.
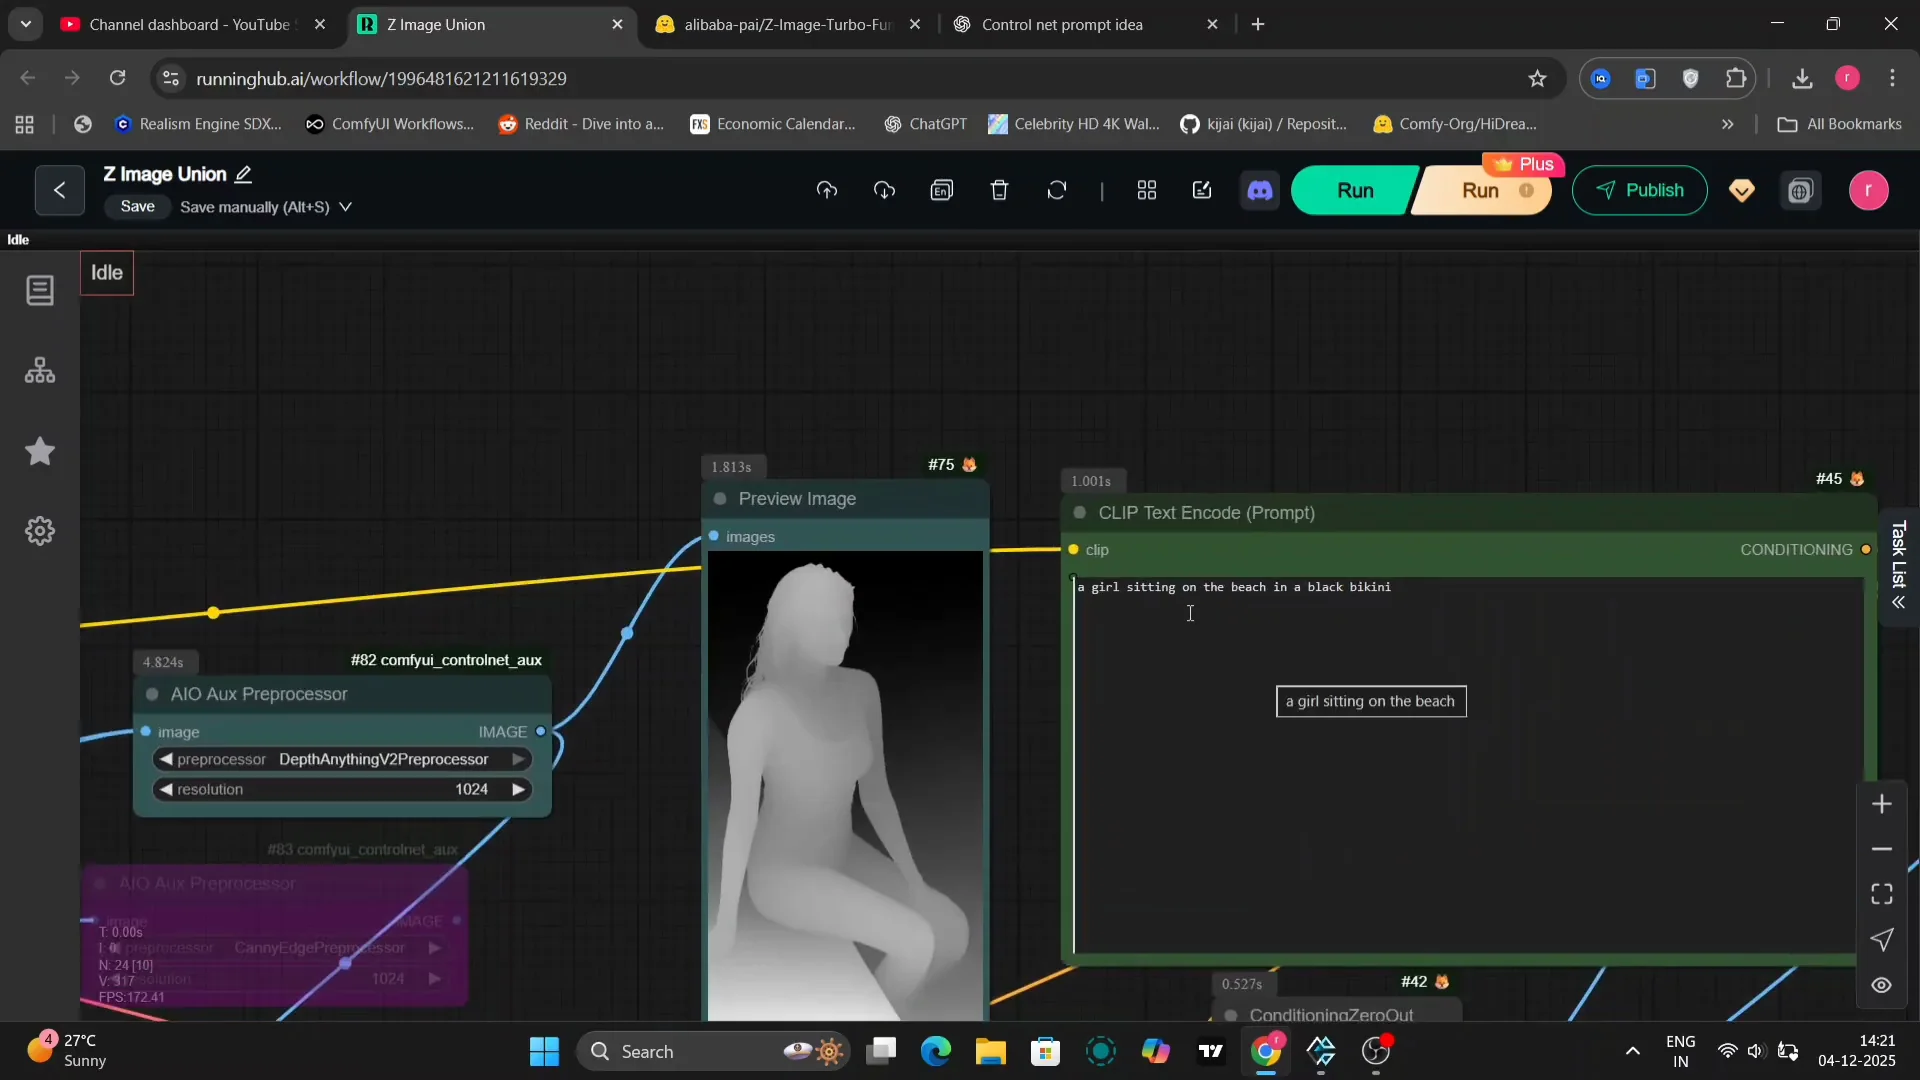
Base Prompt, Sampler, and Steps
For this particular example, I’ve used a simple prompt: a girl sitting on the beach. We’re using the ER HD sampler and simple with 10 steps. You can use H steps. It is also perfectly fine. With these settings, this is the image that we get. It looks pretty good.
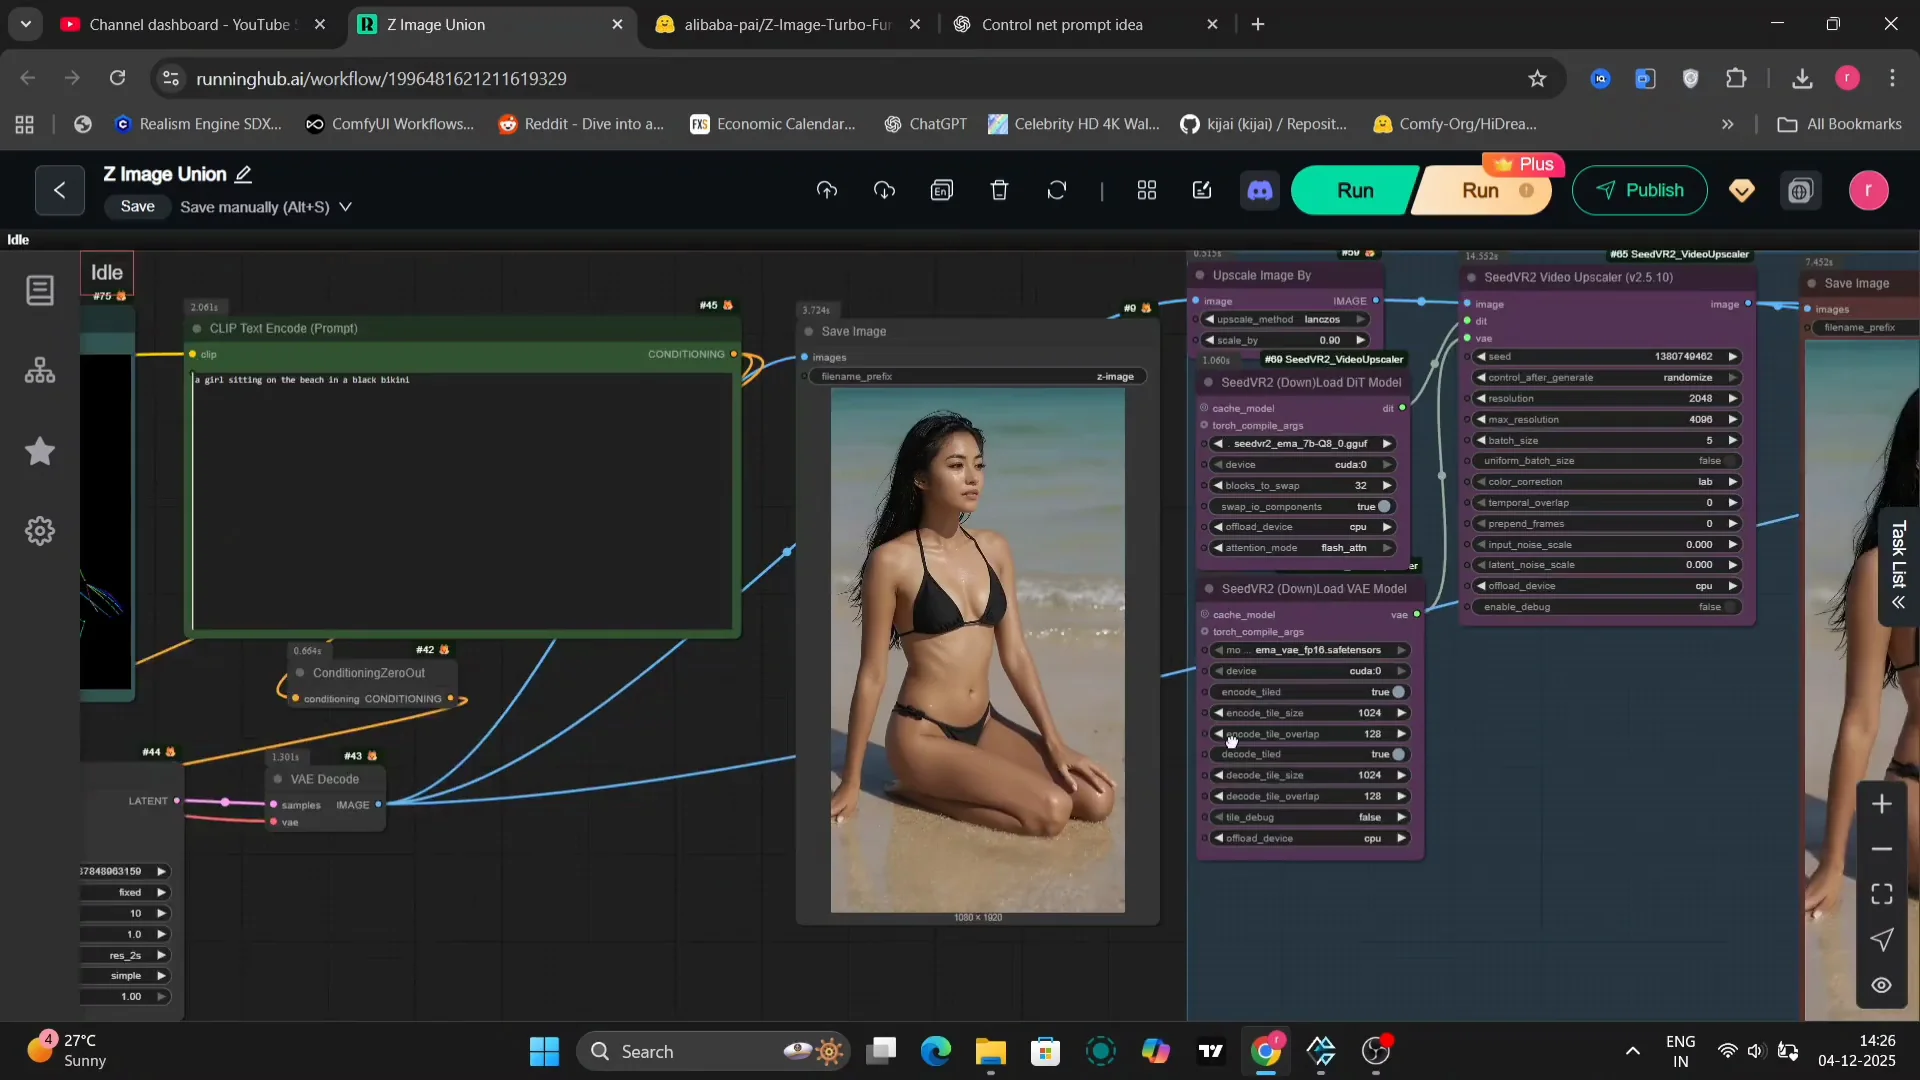
Upscaling and Resolution
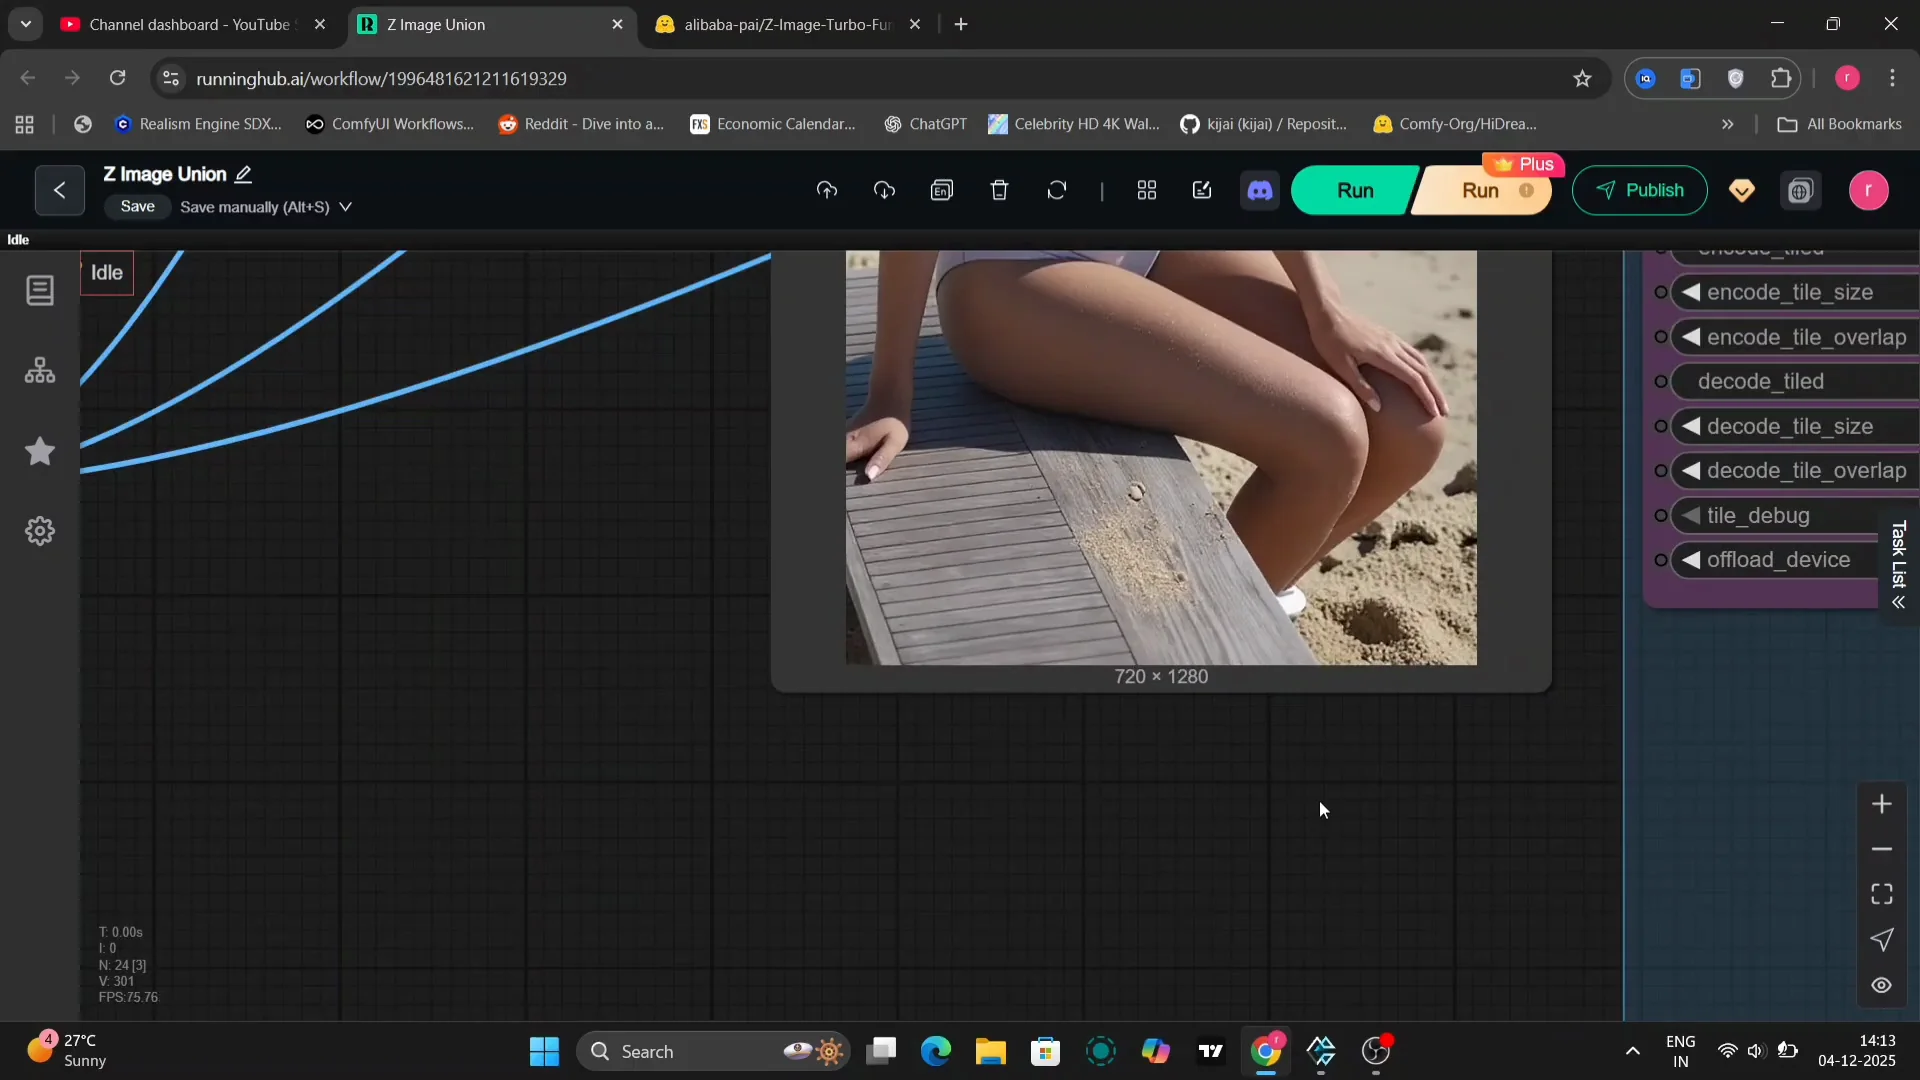
The initial image isn’t quite HD quality, so we’re going to upscale it. I realized that I made a mistake. My resize image setting was only at 1,280. In the next image generation, I upscaled to full HD, 1920 x 1080. This is the upscaled image that we get.
Depth Example in Zimage Turbo ControlNet Union
I updated a few settings to optimize the output, just experimenting a little to see what yields the best results. Everything else remains the same as before. It looks much clearer and sharper than the previous example. There’s a massive difference between the normal image and the upscaled image in terms of clarity, detail, and overall visual appeal.
Here’s the DEP V2 pre-processor, a specific tool within the workflow. You can use this pre-processor as well. It offers different characteristics. We’ve changed the settings to RS2S and simple. These are specific parameters related to the sampling or processing methods being used.
This is the upscaled version of the image generated based on our prompt and settings. The difference between the original and this upscaled modified version is quite noticeable. It looks pretty amazing. I’m quite pleased with the result.
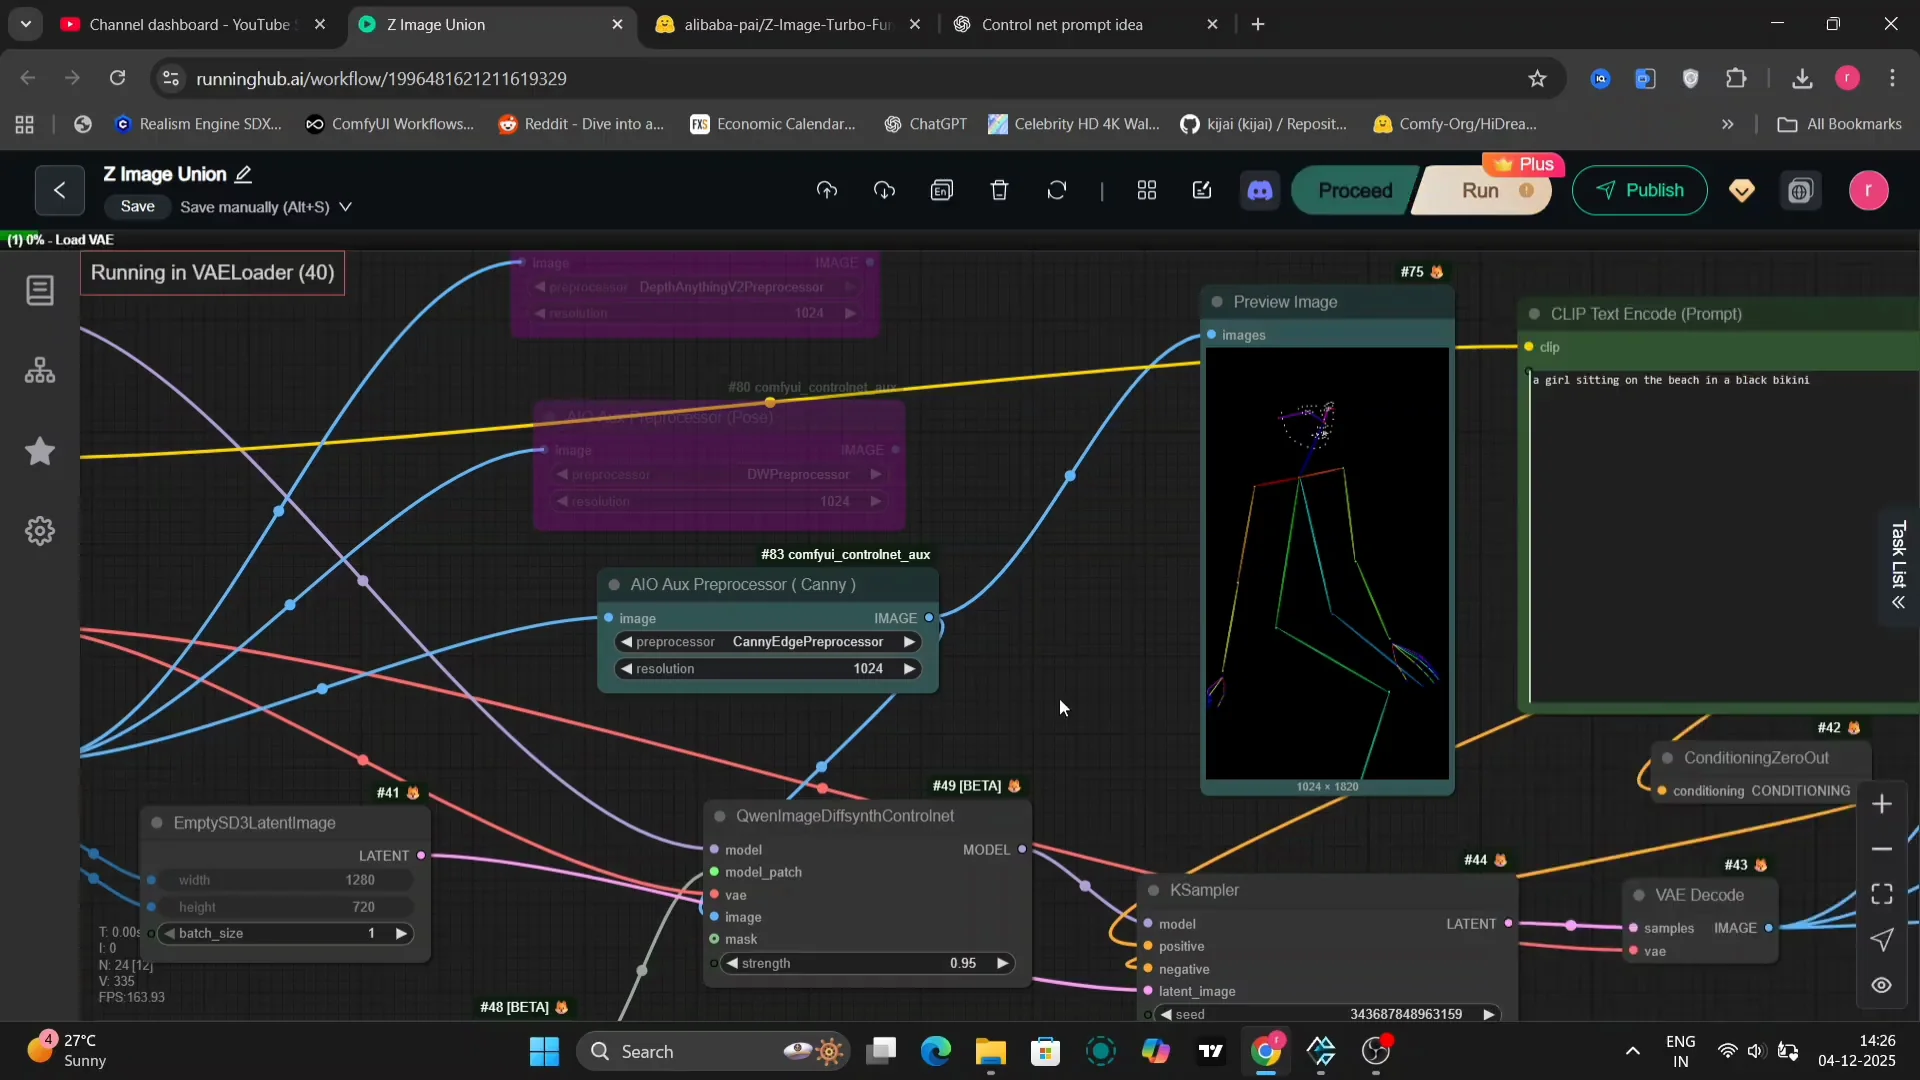
Pose Example in Zimage Turbo ControlNet Union
I’ll show a pose example focusing on manipulating the pose of the subject in the image. I’ll leave all three right here, readily accessible. You can enable whichever one you want and connect it to the image node within the Quinn control net, a specific interface within the software. That’s it, ready to run.
This is the image that we get. It looks a little bit weird because she’s crossing her legs in the control net. It seems the pose instruction has been implemented, although perhaps with an unexpected outcome. It’s pretty good overall. I like this result. If you’re not satisfied and want the exact same pose replicated more accurately, you can run the workflow again. It will happen.
Applying Canny and Depth in Zimage Turbo ControlNet Union
To apply a canny edge detection effect, connect the image node to the canny input and route the output to the corresponding input. You’ll get the Canny control net applied to your image. If you want to use depth processing, do the same thing, connecting the appropriate nodes to the depth model. This is working pretty good.
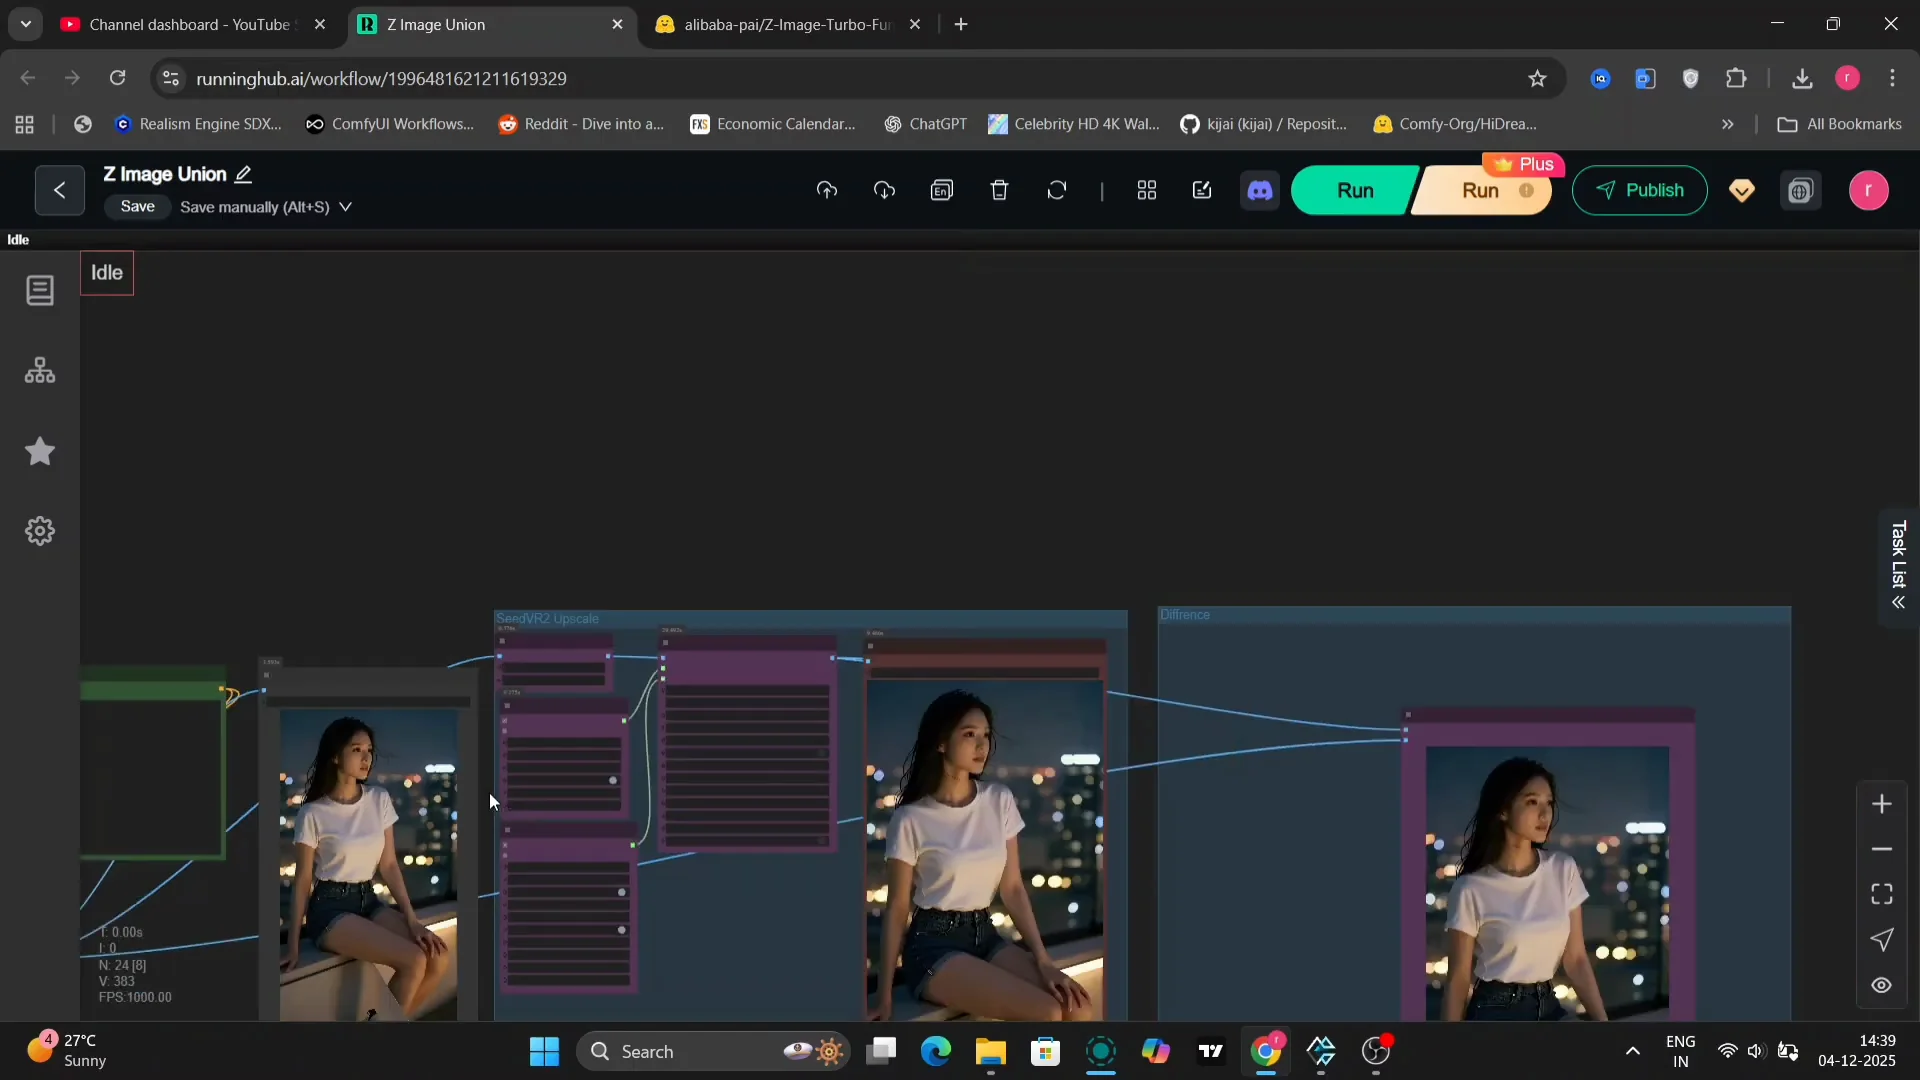
Prompt Example: Rooftop at Night
Here’s the prompt I’ll be using:
- A rooftop at night with neon light. Everyone wearing a white t-shirt. Casual.
This is the full image generated based on that prompt. Looks pretty good. I added a detail specifying that she is wearing sport shoes. It wasn’t proper in one attempt because the control net image didn’t have legs visible, so it got a bit weird. I updated it to she’s wearing lightweight running shoes, and that addressed it.
I’m using eight steps, ULA simple. I just want to check ULA simple. This is taking around 1.3 to 1.5 minutes on an RTX 490 with 24 GB of VRAM.
Final Thoughts on Zimage Turbo ControlNet Union
Zimage Turbo on ControlNet Union works well with canny, depth, and pose, as long as the models and files are placed in the correct folders. Strength settings around 0.95 to 0.9 are a solid starting point, and upscaling to 1920 x 1080 brings a clear jump in quality. The DEP V2 pre-processor and different samplers like ER HD and ULA simple offer distinct results, and small prompt and node adjustments can correct pose or apparel quirks quickly.
Recent Posts
How to use Grok 2.0 Image Generator?
Learn how to access Grok 2.0’s AI image generator (Premium required), write better prompts, and avoid pitfalls like real people and brands. Step-by-step tips.
How to use Instagram AI Image Generator?
Use Meta AI in Instagram DMs to turn text into images—and even animate them. It’s free, fast, and built in. No external apps needed; create art right in chat.
Leonardo AI 2026 Beginner’s Guide: Create Stunning Images Fast
Learn Leonardo AI step by step—sign up, explore Home, and generate or enhance photos with free, powerful tools. A quick, clear starter for beginners.