How to use Z-Image-Turbo in comfyUI?
We recently got a new open-source AI image generation model that easily rivals closed source competitors like Nano Banana, and Seedream. This model is proficient in realism, is blazing fast, generating images in as low as 20 seconds. It can generate 4 megapixel images. The full version can easily run on a GPU with 16 GB of VRAM, and with the help of some GGuF magic, you can run it on as low as 6 GB of VRAM, or maybe even less, and still get good results.
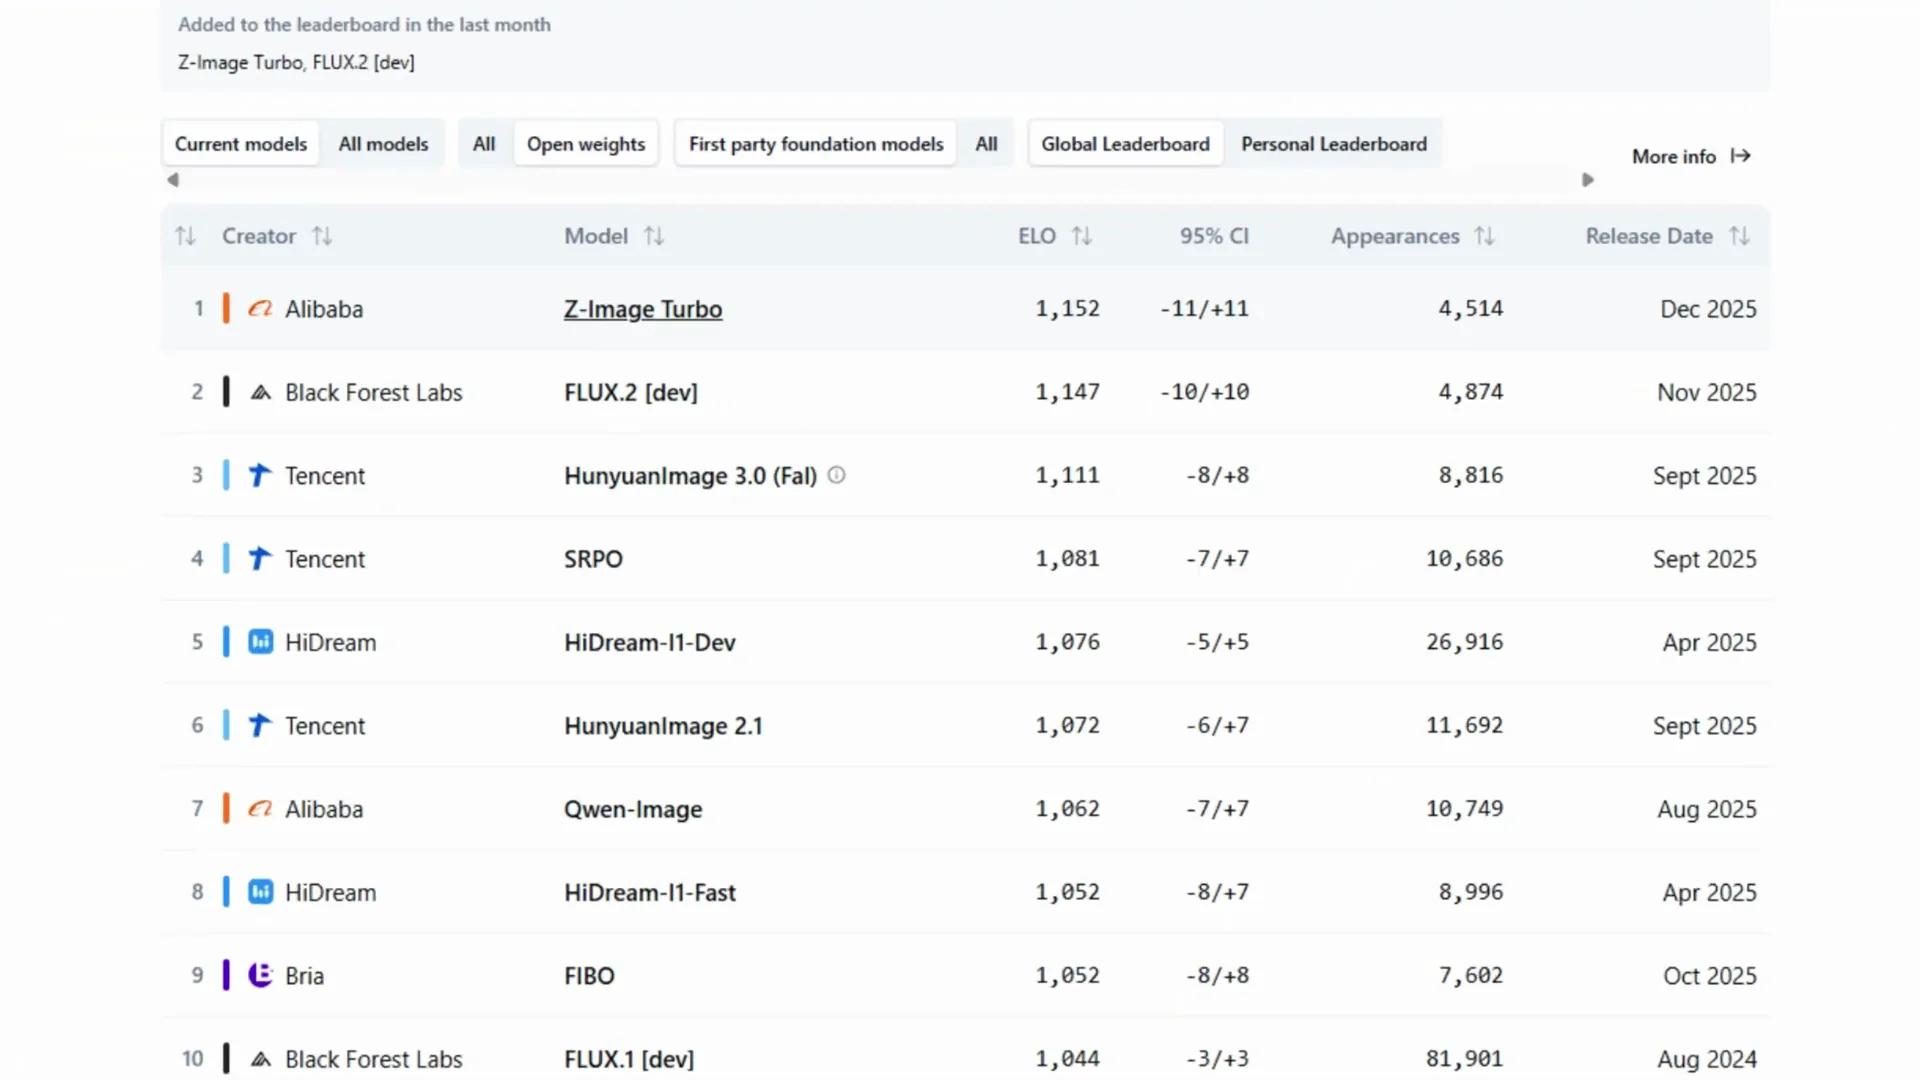
On top of all that, the model is fully uncensored, so you can generate any image you want without any restrictions. The model is called Zimage Turbo by Alibaba. If we take a look at the AI image leaderboard from artificial analysis, it is currently in the number one spot in the open-source category, beating even Flux 2.
Z-Image-Turbo at a Glance
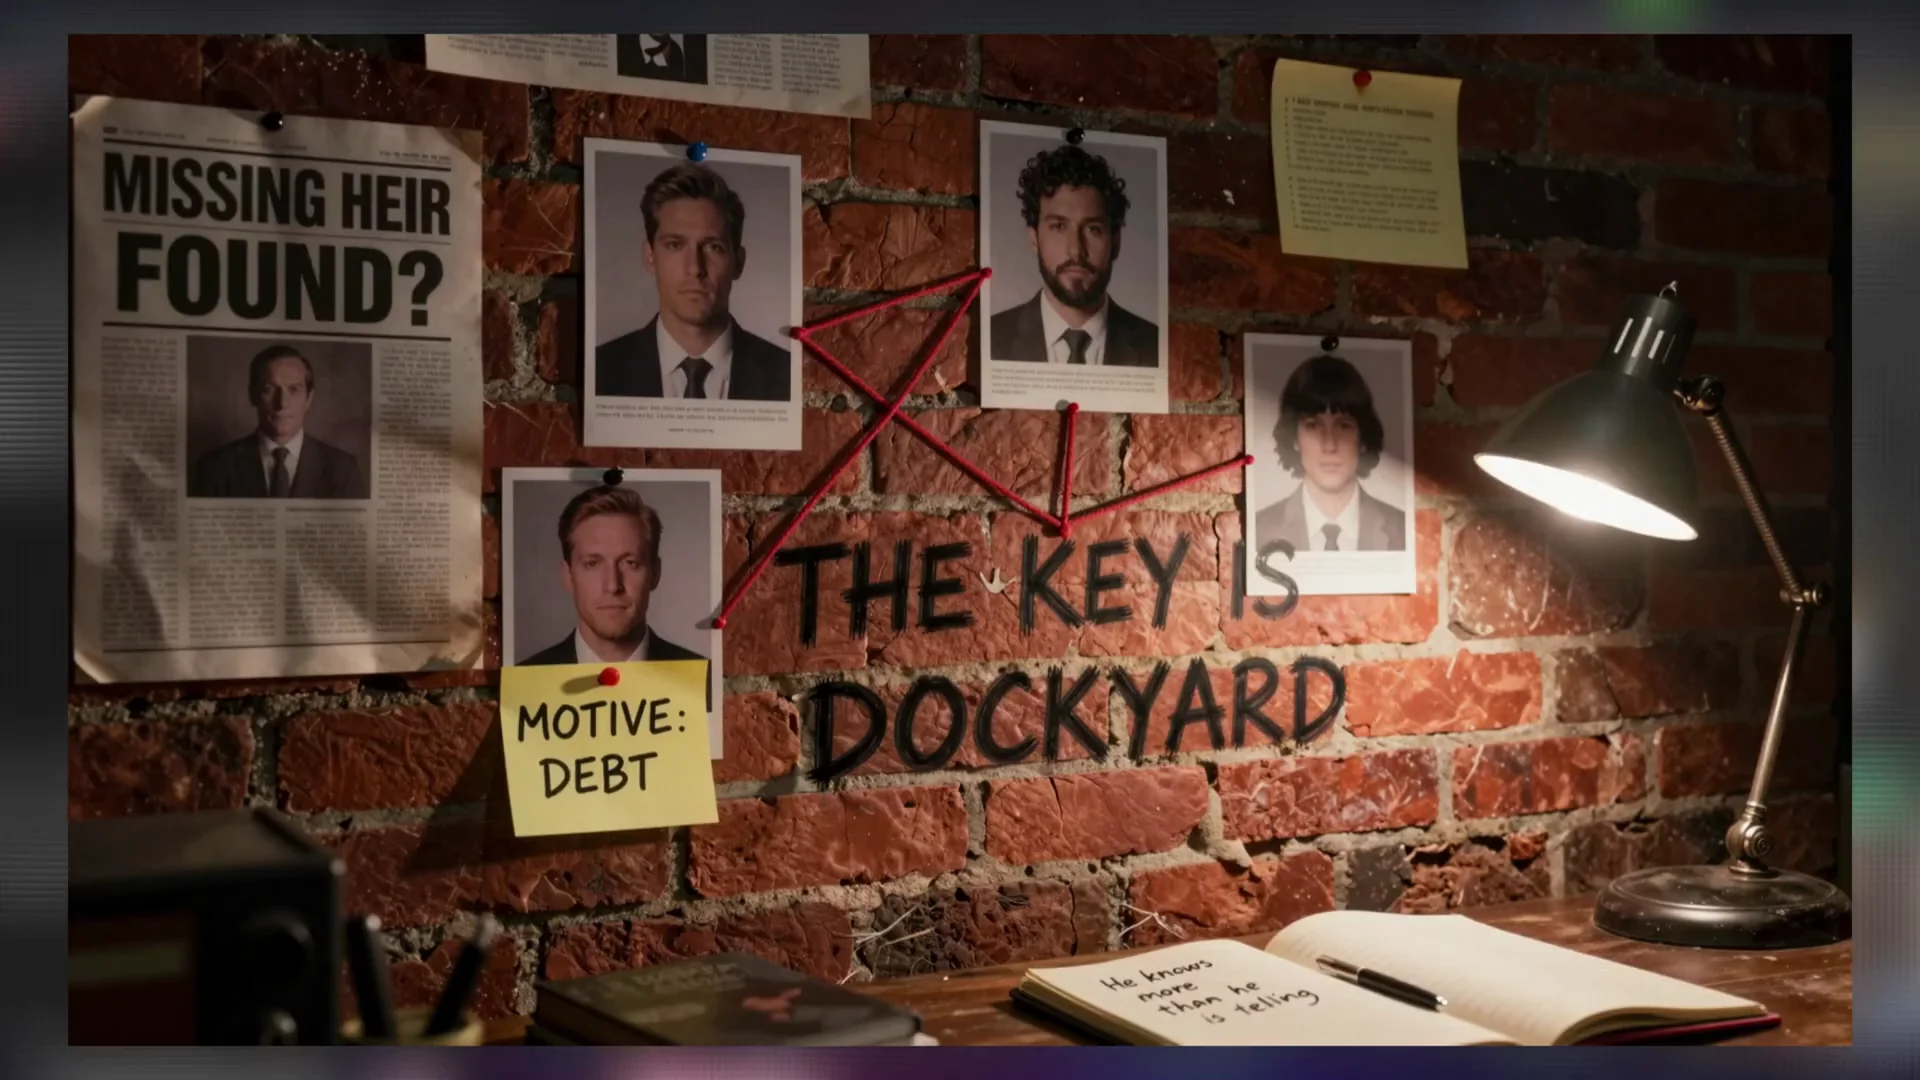
Here are some images I generated using Zimage Turbo. It is able to generate really nice realistic looking images, and it can also natively generate 4 megapixel images. In this example, it is also able to generate pretty coherent text in images. Keep in mind that it is not perfect, so limit your expectations.
Install and Run Z-Image-Turbo in Comfy UI (Full Model)
I am going to show you how to install and run the full model in Comfy UI. I am also going to show you how to install the GGuF models and workflow so you can run Zimage Turbo on as low as 6 GB of VRAM.
Download the required files
Go to the official Comfy UI page for Zimage. Zimage is only a 6 billion parameter model, which is pretty impressive. It fits very comfortably on a 16 GB VRAM device, which is exactly how much VRAM I have.
Scroll to the section with the model download links. It tells you exactly where to save each file.
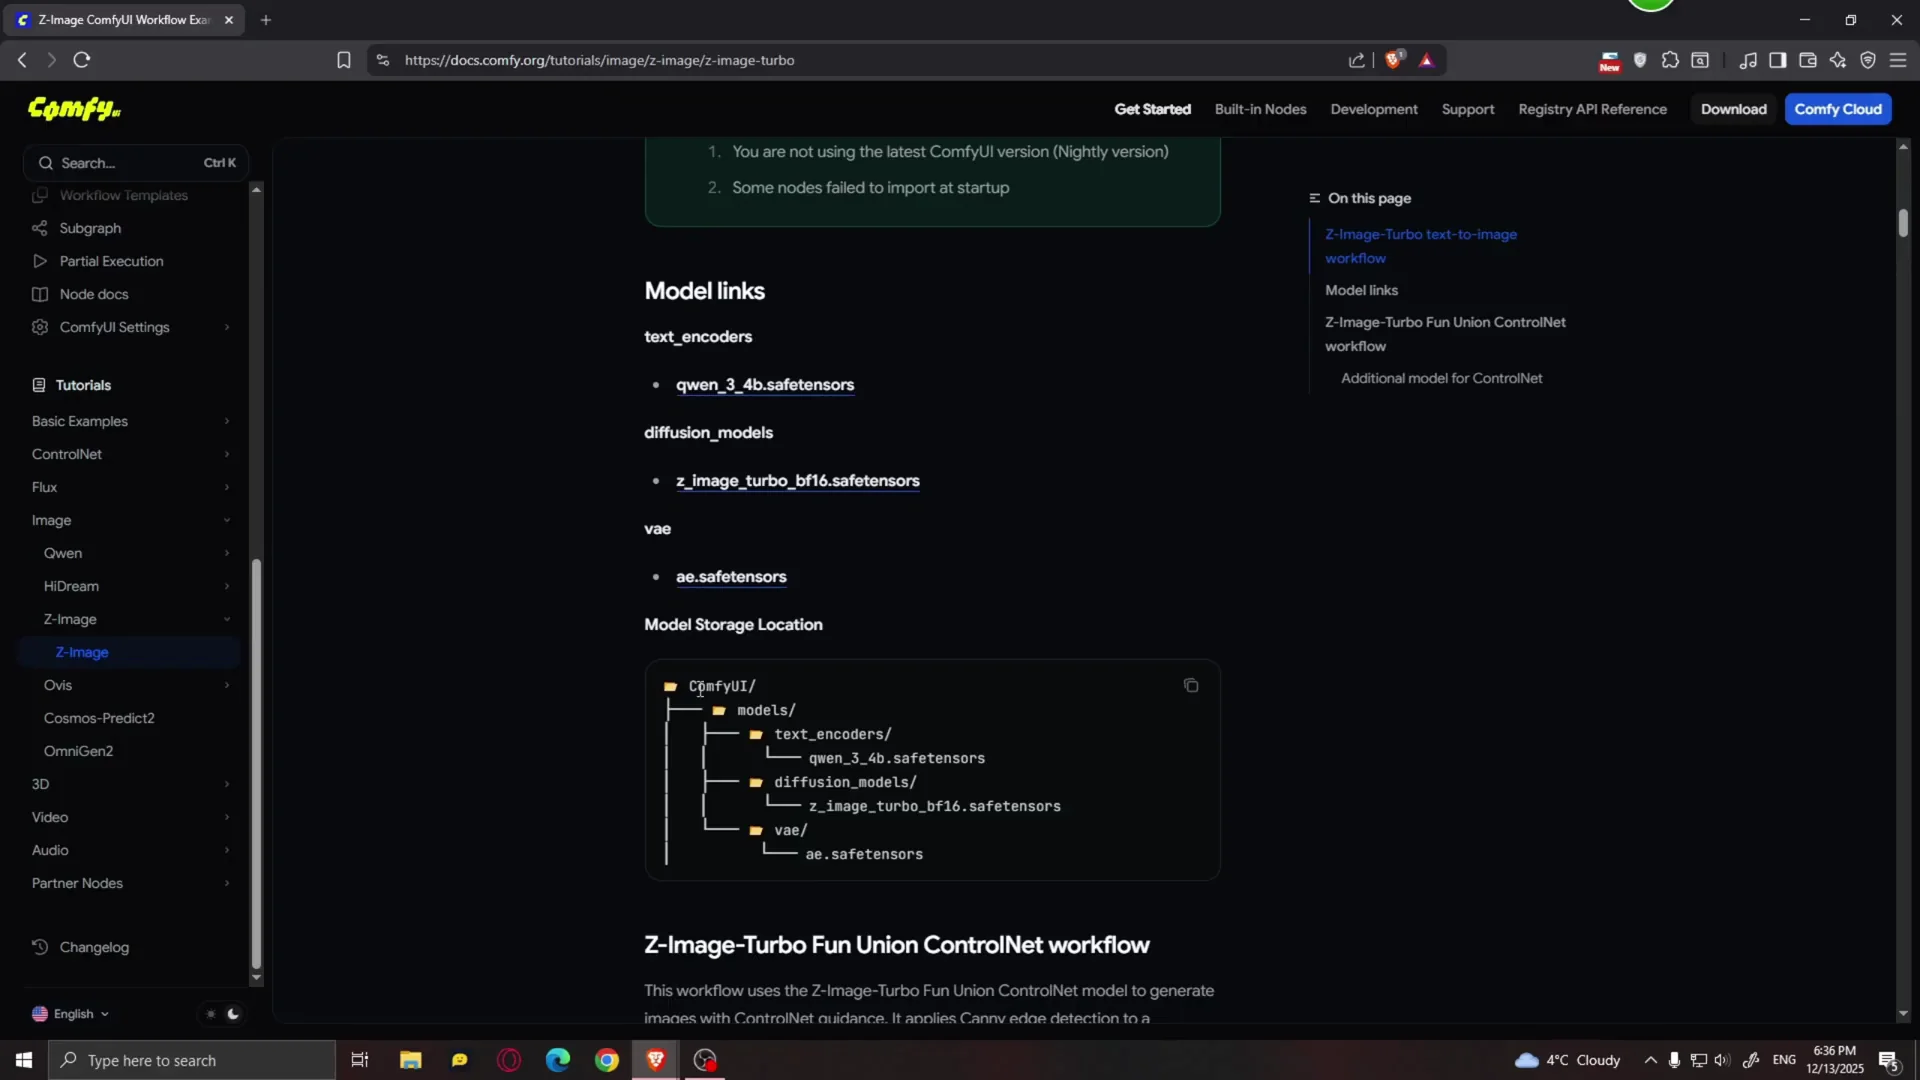
- For the Quen 34 billion safetensors, save it in the text encoders folder. In your Comfy folder, go to models, then text encoders, and save it there.
- Download the model itself and save it in the diffusion models folder.
- Download the VAE safetensors and save it in the VAE folder.
Update Comfy UI and load the workflow
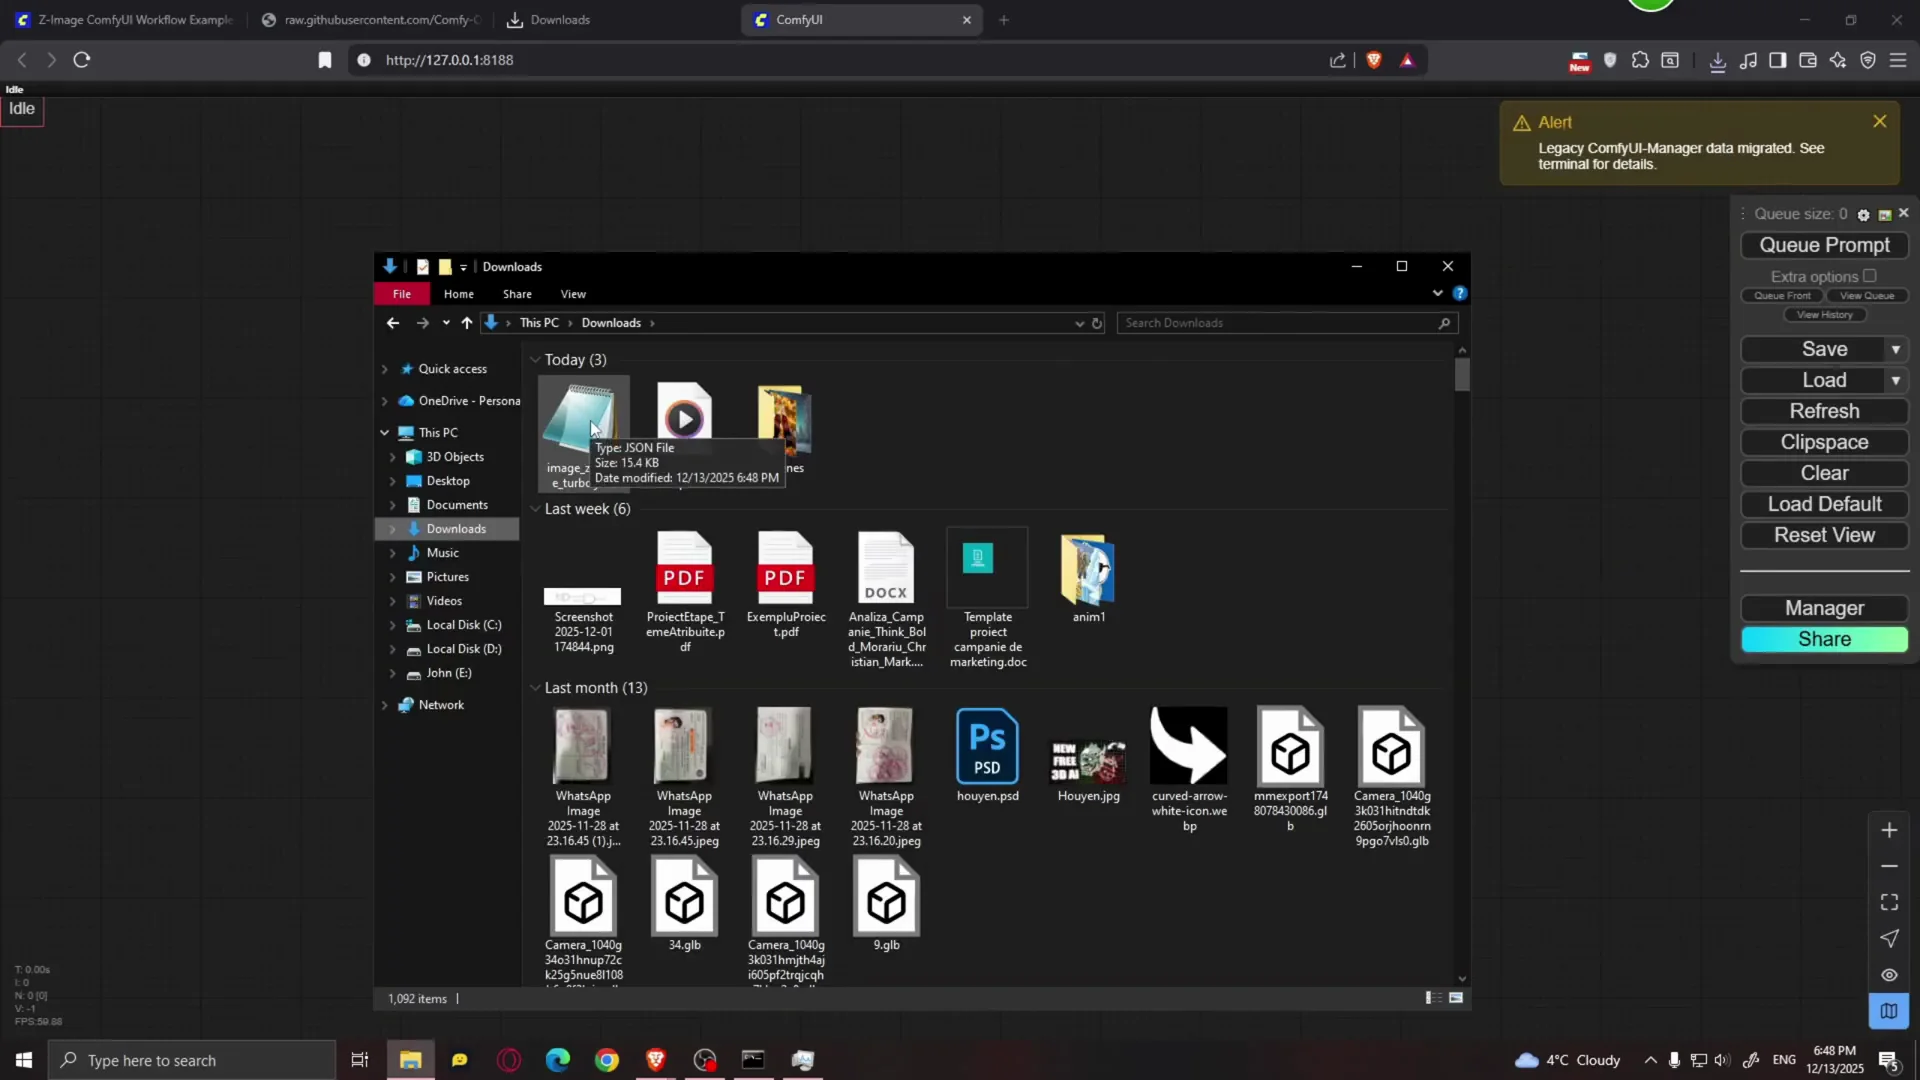
Open Comfy UI. Go to Manager and click on Update all. After updating, restart Comfy UI.
Go back to the Comfy UI page and download the JSON workflow file. Save it wherever you want. In Comfy UI, drag the JSON file into the canvas. If a message appears, click X. This is the workflow.
Select the right model and components
- In the Load Diffusion Model node, select the Zimage Turbo model.
- In Load CLIP, select the Quen 34B safetensors.
- In the VAE section, select the correct VAE.
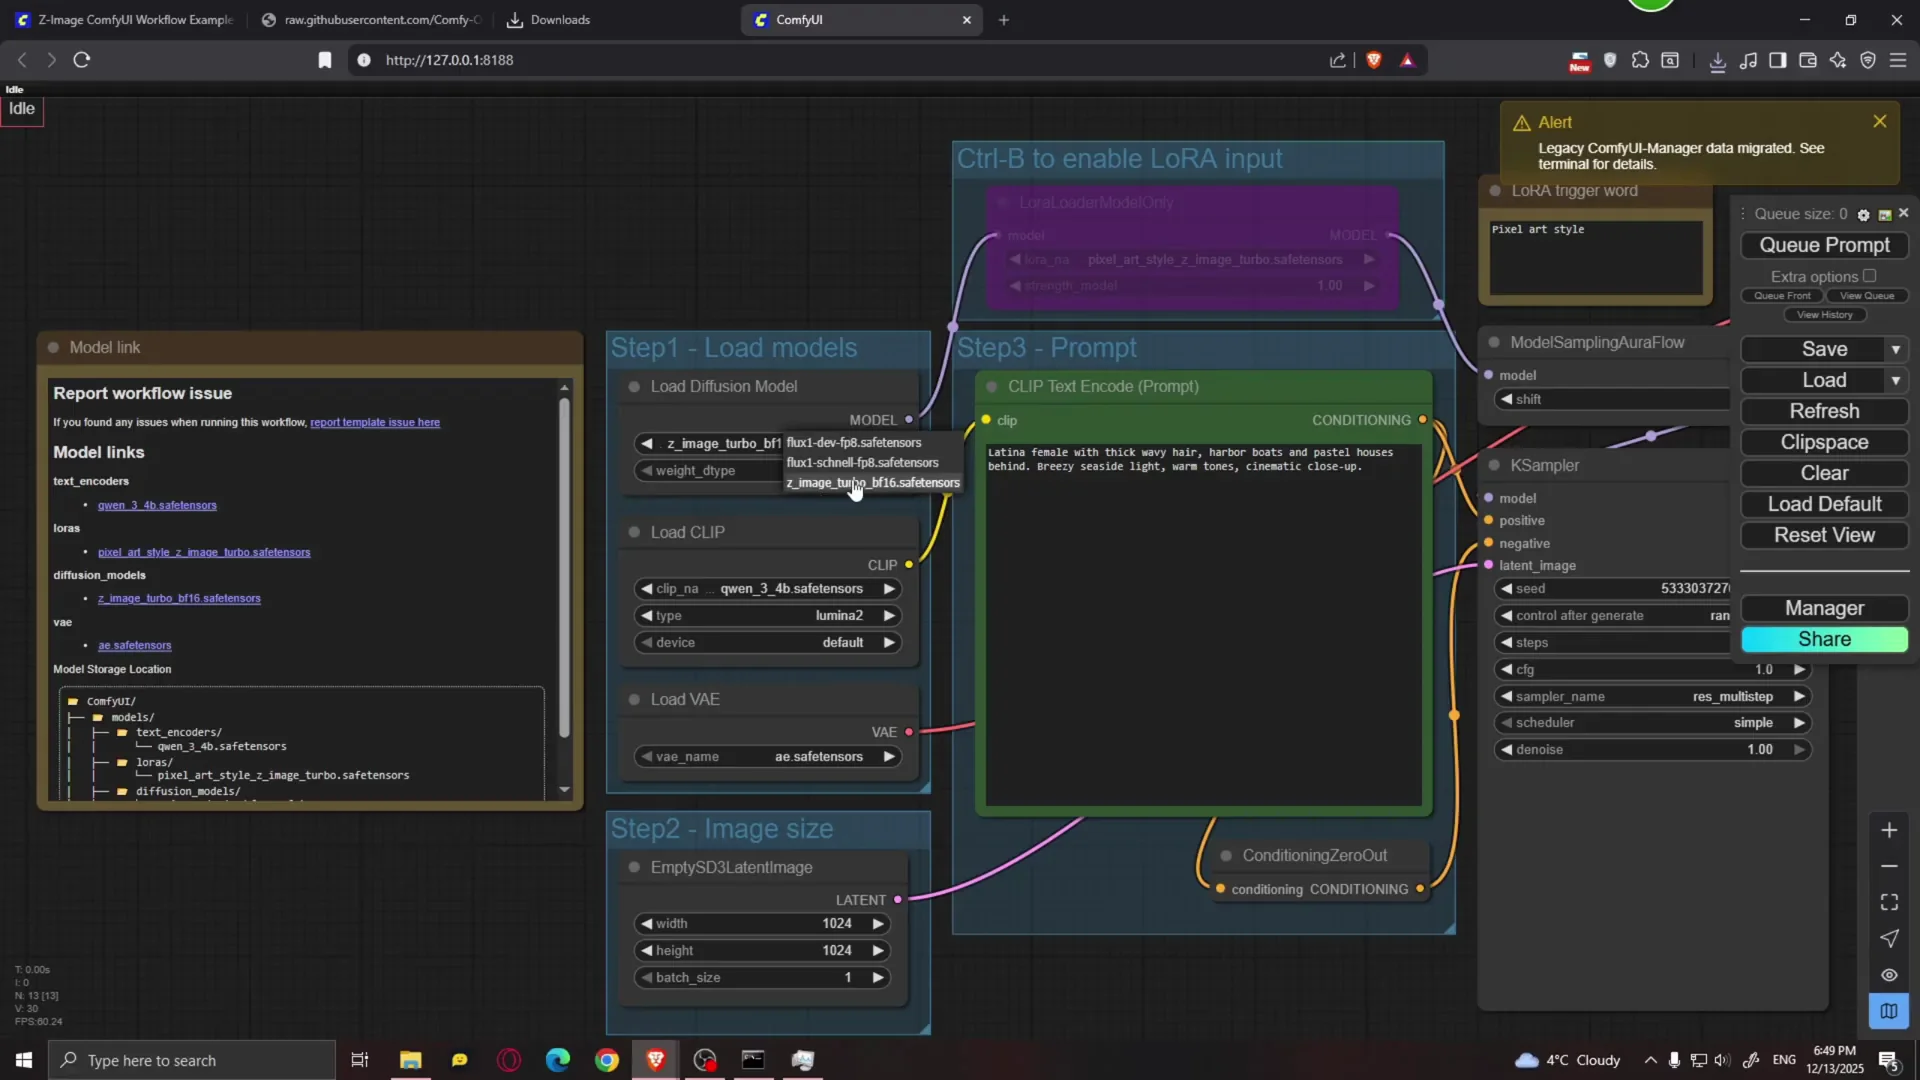
In the prompt box, type whatever prompt you want. I used a very long prompt from Civot AI that should generate an image of a cowboy bandit.
Generate and scale resolution
Queue Prompt. Comfy UI will load the model, and after that images will generate faster. The first run might take a while.
The first image was 1K. Zimage can also do 2K, so I doubled the resolution. Because the resolution doubles, generation takes more time. The result looked good aside from an artifact, so I reduced the resolution to 1920 x 1080. The result looked much better, with good detail and high resolution.

You can reduce the size back to 1024 x 1024 to see how quickly it generates on 16 GB of VRAM. Because this is a turbo model, it only requires a few steps. Ideally, play with the steps value and see what gives you the best results. More steps may give you more detail, but if you give it too many, generation time increases and you stop seeing more detail at some point. I recommend leaving this somewhere between 8 and 10 steps. I set it to 9.
I tried a different prompt for a cat samurai and left everything else by default. It only takes about 1.84 seconds per iteration. The prompt executed in 26.47 seconds, which is really fast, especially compared to something like Flux. The result looks pretty good. The cat is cute.
I also tried a prompt that includes a bunch of different cartoon characters such as Spongebob, Patrick the Star, Bugs Bunny, Pikachu, Naruto, Mickey Mouse, Scooby-Doo, and Spider-Man at 1920 x 1080. You can recognize many characters, but some weird stuff shows up, like Pikachu having hair, and Batman looks a bit off. There are also missing characters, which suggests the prompt was too detailed for a single image.
Run Z-Image-Turbo on 6-12 GB VRAM with GGuF
This model works very well on 16 GB of VRAM, but if you have less than that from 12 all the way down to 6 GB of VRAM, you are still covered. All you need to do is download the GGuF version of this model.
Download the GGuF model and components
Go to the model page and open Files and Versions. You will see multiple files and the GGuF versions of the Zimage Turbo model.
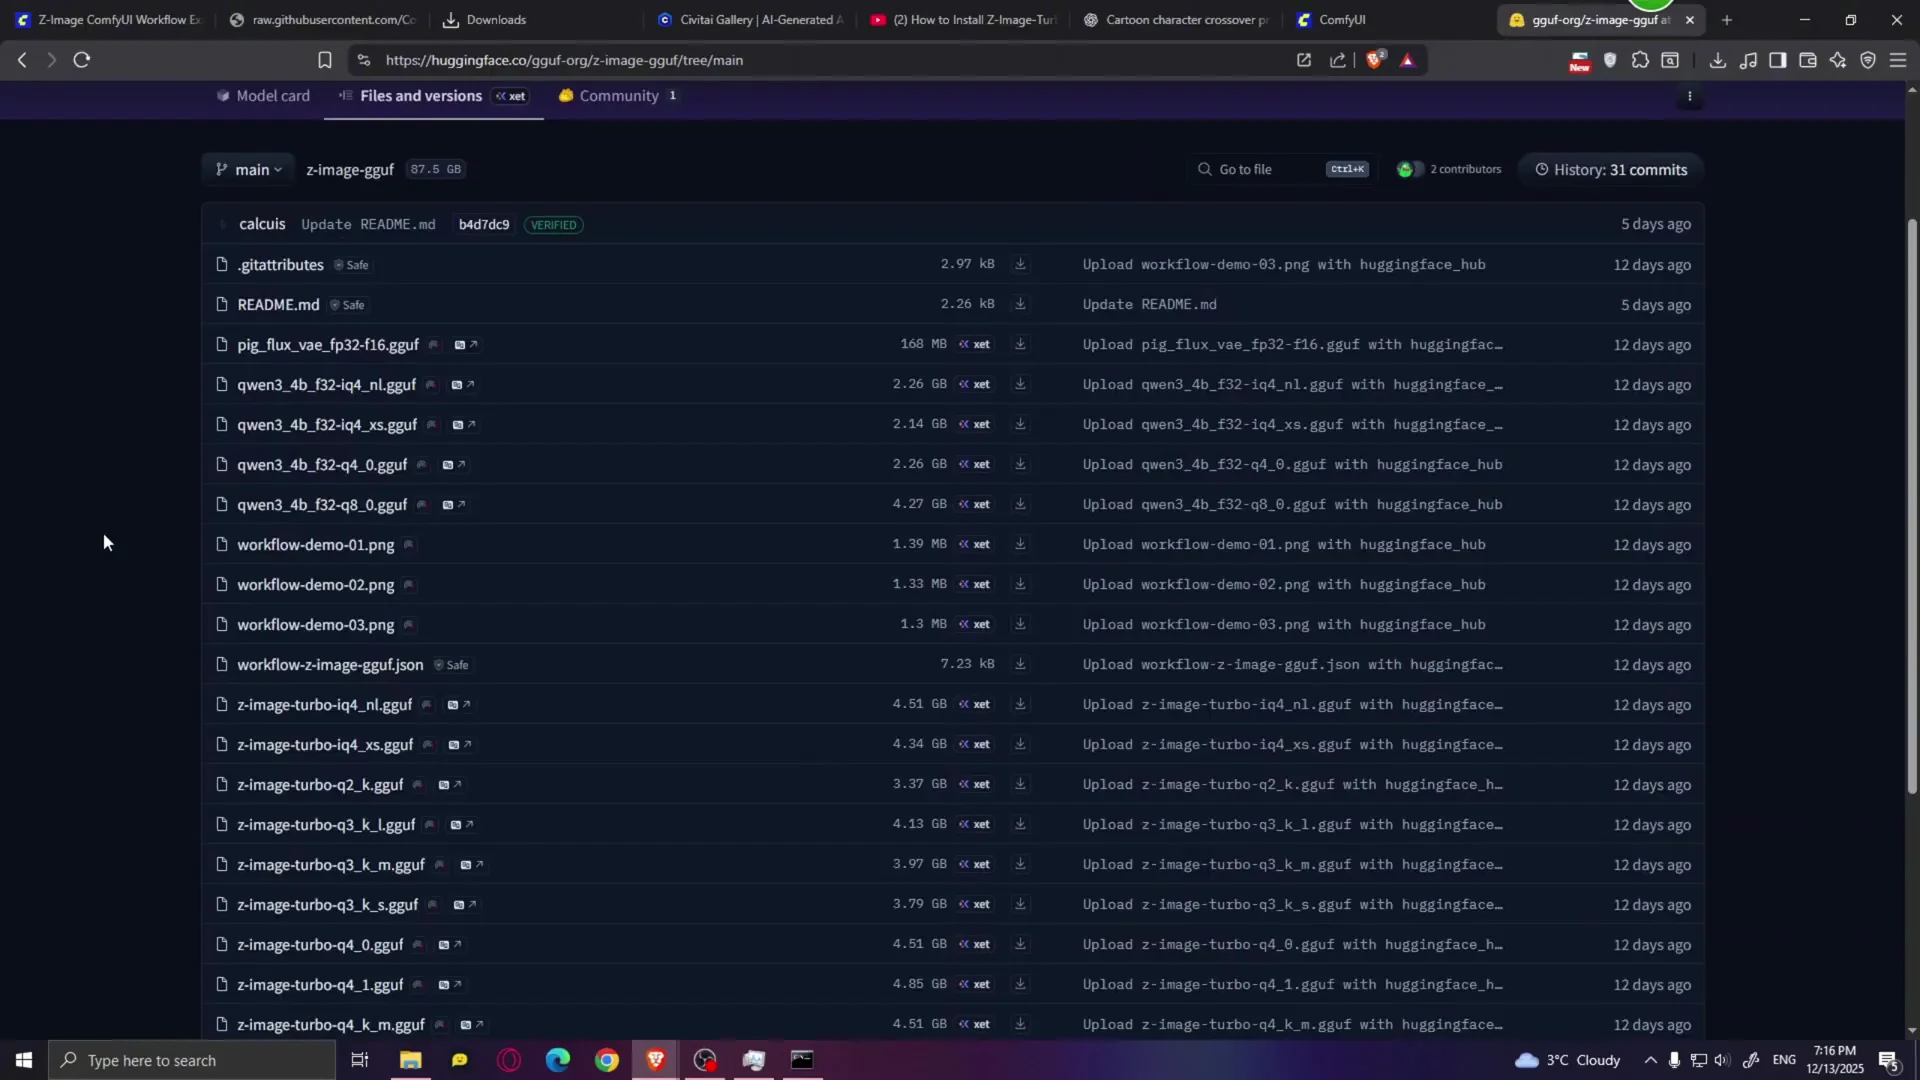
First, download a different CLIP. This should go hand in hand with the GGuF version you plan to use. If you have only 6 GB of VRAM, use one of the smaller models. For this example, I went with Zimage Turbo IQ4XS. Save it in models/diffusion_models.
Next, download the Quen 34B IQ4XS GGuF CLIP encoder. Save it in models/clip. Also download the Pig Flux VAE file and save it in models/vae.
Load the GGuF workflow and nodes
Download the GGuF workflow. Drag the GGuF workflow into Comfy UI. If a message appears, click X.
Go to Manager. Click on Install missing custom nodes and install the two suggested nodes. Then click Restart.
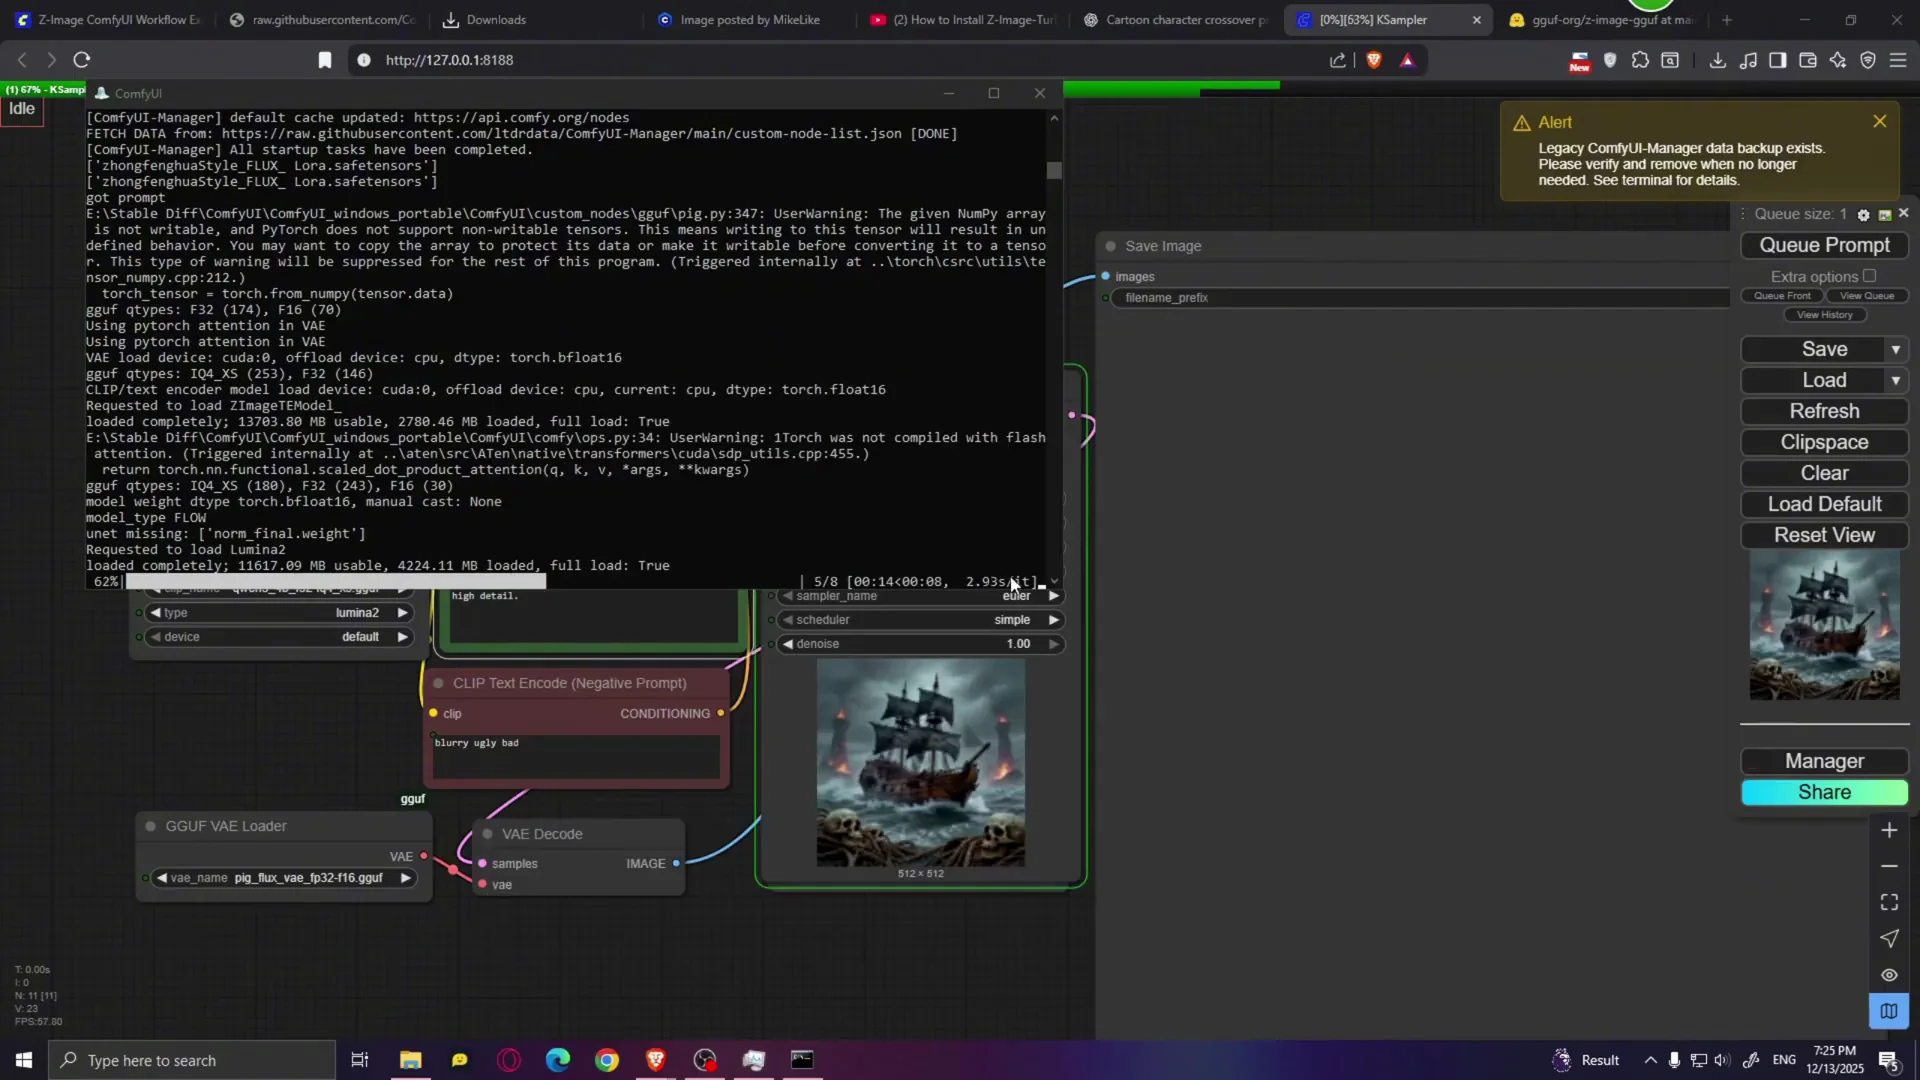
Select the model you downloaded, in my case the IQ4XS version. For CLIP, select the IQ4XS as well. For VAE, select the Pig Flux VAE.
Paste a prompt and click on Q prompt. The model loads into RAM and generates at about 2.93 seconds per iteration, which is not bad. The model file is only about 4 GB, which means it can fit comfortably on 6 or even 5 GB of VRAM. The results look pretty nice.
Change the image size to something like 1080 x 1920 for a portrait image and try another prompt. Generate a more realistic image at 1920 x 1080 and observe iteration speed at around 5.61 iterations per second. The image quality is really nice for such a small model.
I downloaded one of the smaller models, but you can download a bigger model such as Q5 or Q6, maybe even Q8, depending on how much VRAM you have. If you only have 8 GB of VRAM, I recommend going with the Q8 model, which should work very well and may give you better looking results.
Image-to-Image with Z-Image-Turbo in Comfy UI
If you want to do image-to-image, that is simple.
- Double click and add a Load Image node. This is your input image.
- Add a VAE Encoder node.
- Connect Load Image to the pixels input on VAE Encoder.
- Connect the VAE Encoder output to the VAE Loader.
- Connect the latent output up to the KSampler latent image input.
That is it. This will disconnect the image resolution node. Choose an input image. I chose a selfie of a guy. In the prompt, type what you want to see, for example, Elon Musk taking a selfie.
Very important: play with the denoise value. With denoise at 1, the input image does not influence the result at all. At 0.1, the result barely changes. Find the sweet spot. At 0.5, the results start to reflect the input image while still following the prompt. For example, Elon Musk taking a selfie.
Tuning the Model Sampling Shift Value in Z-Image-Turbo
The Model Sampling node has a shift value. If you play with the shift value you will get slightly different results even with the same prompt and seed.
- Shift 1 produces higher contrast and sharpness.
- Shift 3 looks slightly softer.
- Shift 6 produces a noticeably softer image with lower contrast and a different overall look.
Play with this setting and see which value gives you the best results.
Final Thoughts
Zimage Turbo is a fast, realistic open-source model that can generate up to 4 megapixel images and runs well on 16 GB of VRAM. With GGuF variants, you can get solid results on as little as 6 GB. It performs well with short generation times, supports higher resolutions, and offers flexible controls like steps, denoise, and shift value to fine tune output. If you need image-to-image, the Comfy UI setup is straightforward and responds predictably to denoise and CFG adjustments.
Recent Posts
How to use Grok 2.0 Image Generator?
Learn how to access Grok 2.0’s AI image generator (Premium required), write better prompts, and avoid pitfalls like real people and brands. Step-by-step tips.
How to use Instagram AI Image Generator?
Use Meta AI in Instagram DMs to turn text into images—and even animate them. It’s free, fast, and built in. No external apps needed; create art right in chat.
Leonardo AI 2026 Beginner’s Guide: Create Stunning Images Fast
Learn Leonardo AI step by step—sign up, explore Home, and generate or enhance photos with free, powerful tools. A quick, clear starter for beginners.